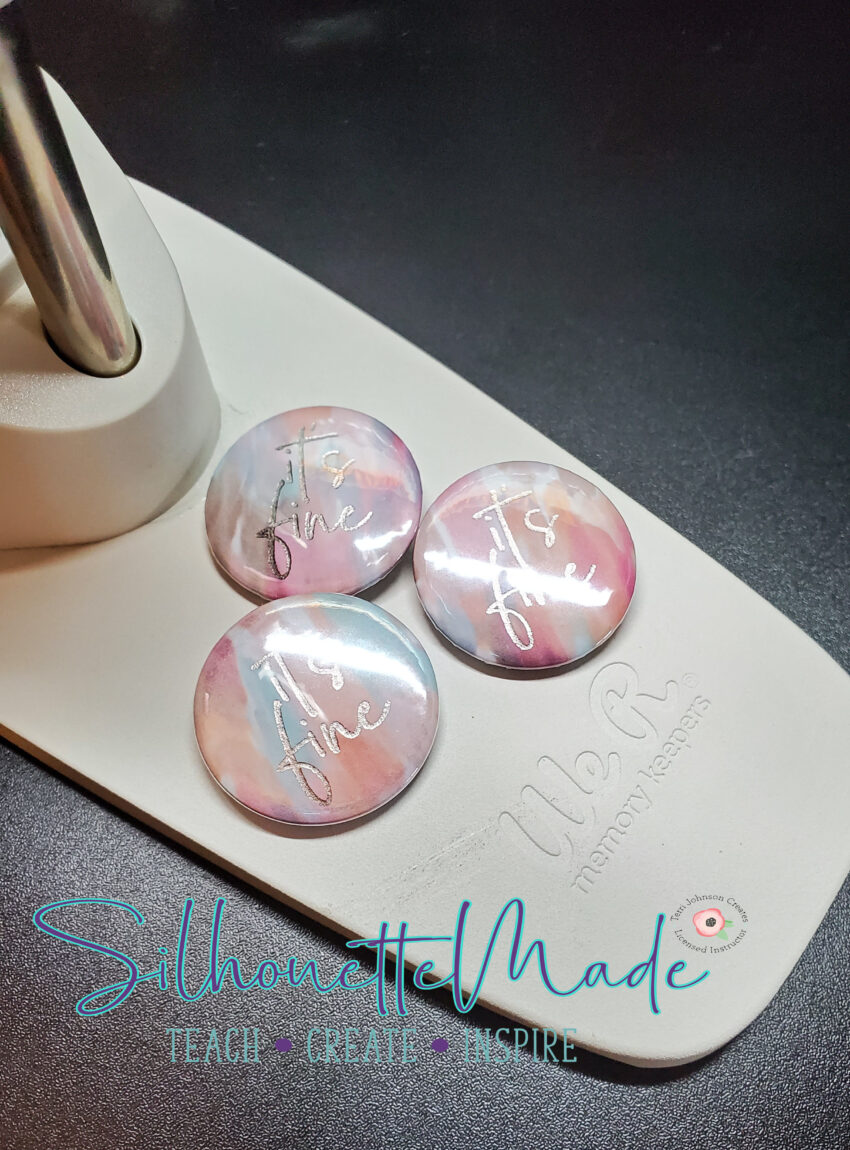
I just got the We R Memory Keepers Button Press and I absolutely love it. It is so much fun!! I’ve been making tons of buttons since I got it last week. I realize that I like using my cameo or portrait to cut the button picture out more than I like using the cutting dies that come with the machine, although they work great if I don’t need to turn on my computer to make a button.
But most of the stuff I’ve been doing has required me to print something out, so because I’m already using my computer, and silhouette studio, to print out my design I figure I would just use it to cut it out as well.
For this project, I’m going to use the We R Memory Keeper Foil Quill to foil a design onto some Sparkleberry cardstock and use that to make a button.
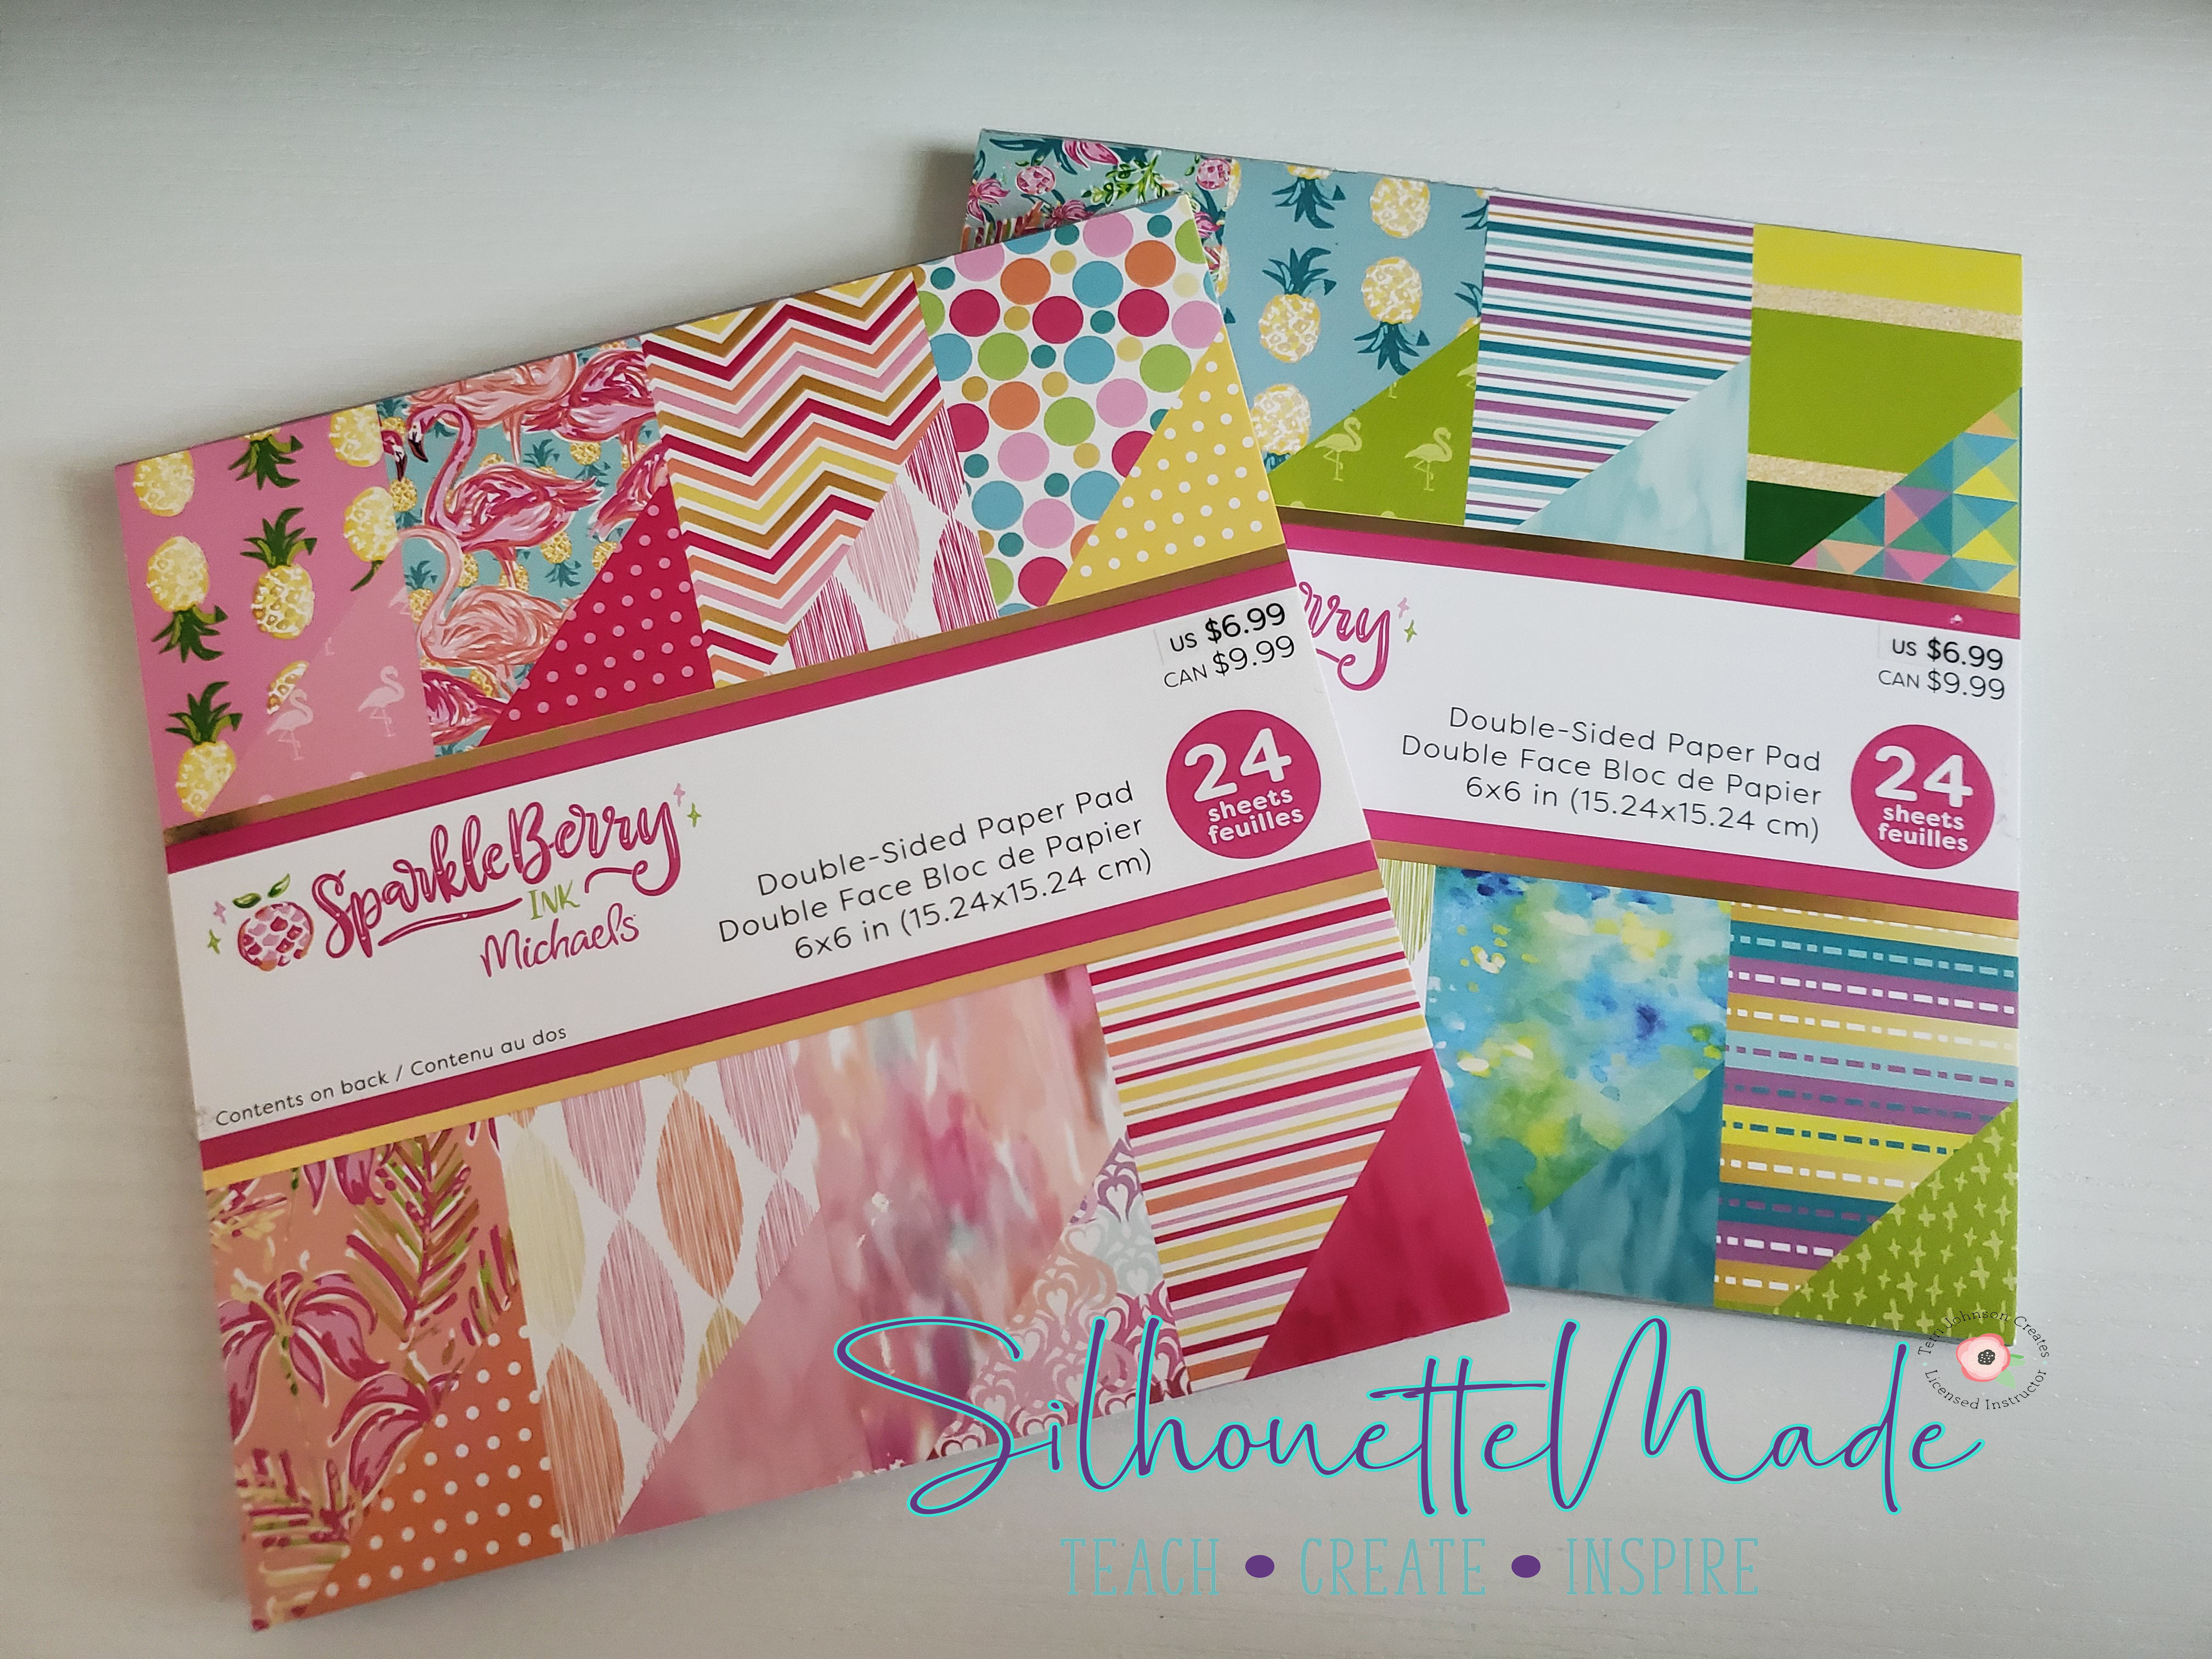
I am obsessed with all things Sparkleberry. If you haven’t checked them out, you really should. The website is sparkleberryink.com. There are so many beautiful printed adhesive vinyl and HTV patterns I just want them all. I get the monthly subscription box and let me tell you it’s fantastic! They also have exclusive products for sale at Michaels (which is where I got the paper pack).
So, let’s get started.
First I’m going to open up Silhouette Studio. On the page setup panel, I’m going to set my media size to 6 x 6. This is the size of the Sparkleberry cardstock that I’m going to use.
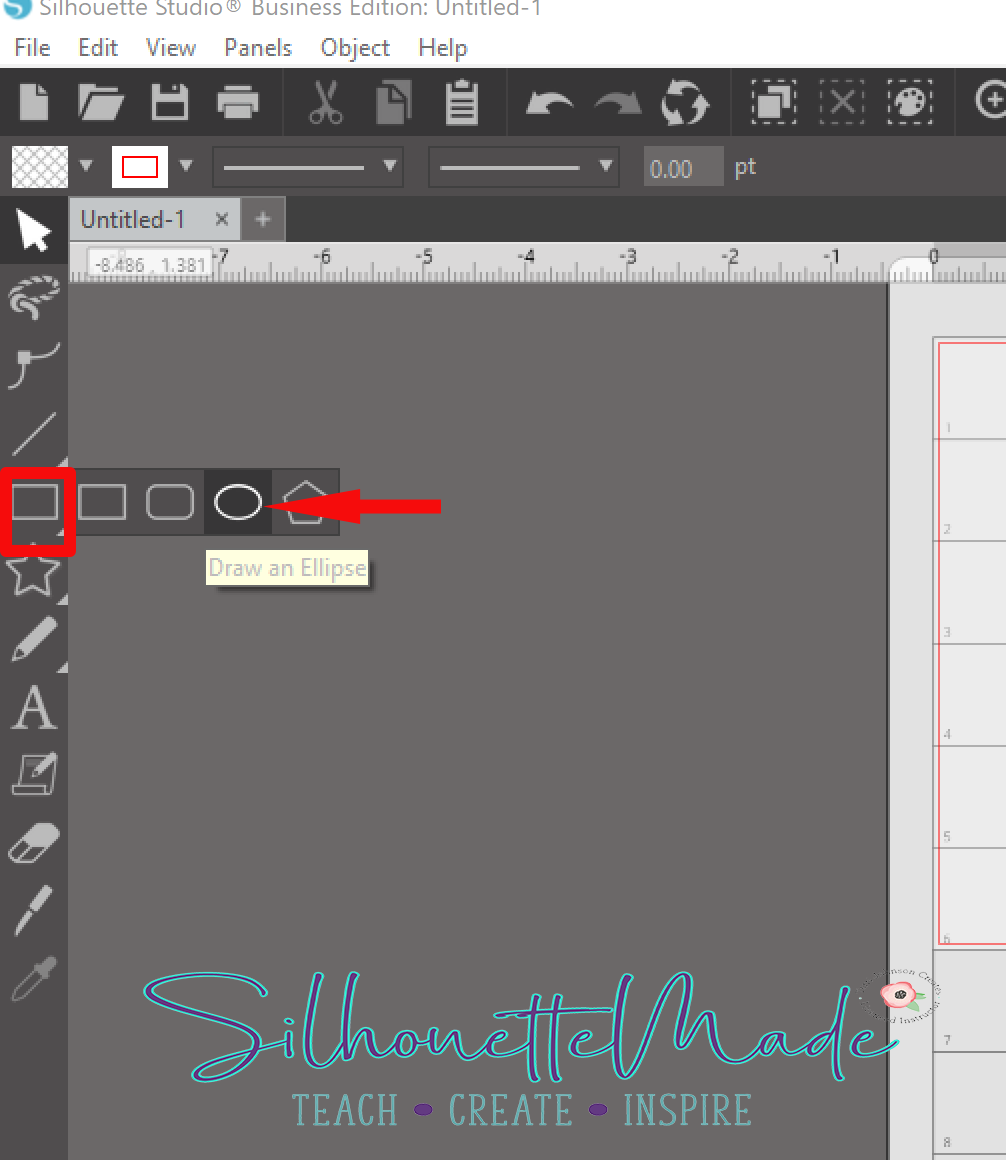
Then I draw two circles with the ellipse tool. If you hold the shift key down on the keyboard while you draw the circle it will keep it perfectly round.
Since I am using the medium size button for this. I need to size my circles. The bigger circle will be the size I need to cut and the smaller circle I will use as a guide to size my design. The smaller circle represents the part of the button that will show when it is complete. The measurements for the buttons are given in the manual for the button press. But they were listed in mm and not in inches, so a quick Google search gave me the conversion.
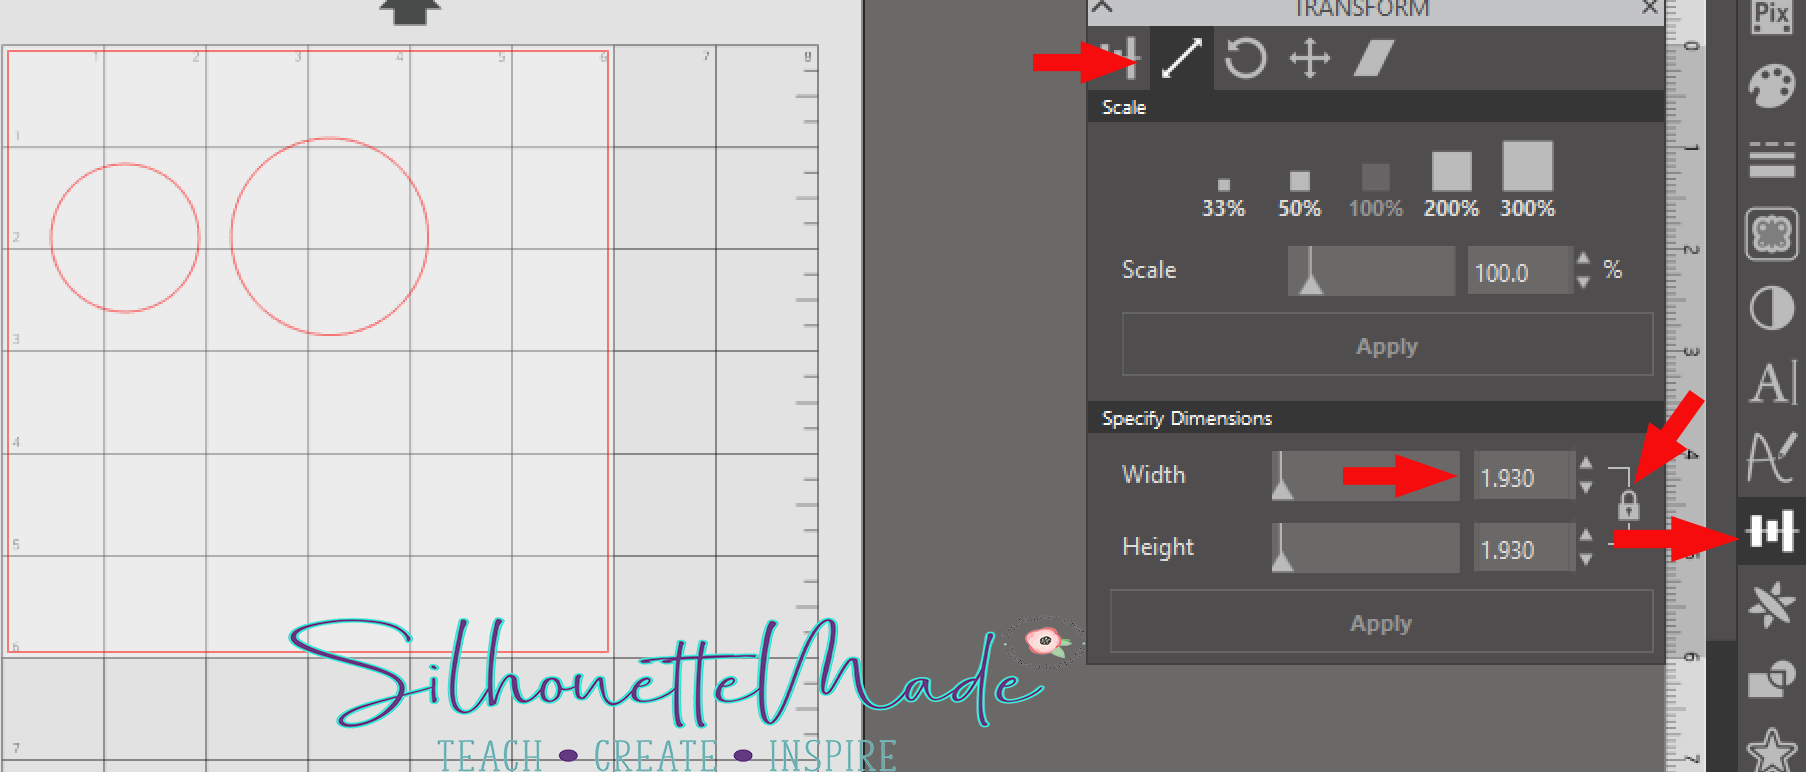
To size the circles I use the Scale Tab on the Transform Panel. First I select the bigger circle, and under Specify Dimensions I make sure the lock is in the lock position and type in 1.93 then hit apply. Then I select the small circle and type in 1.45 and hit apply again. Now the circles are the correct size.
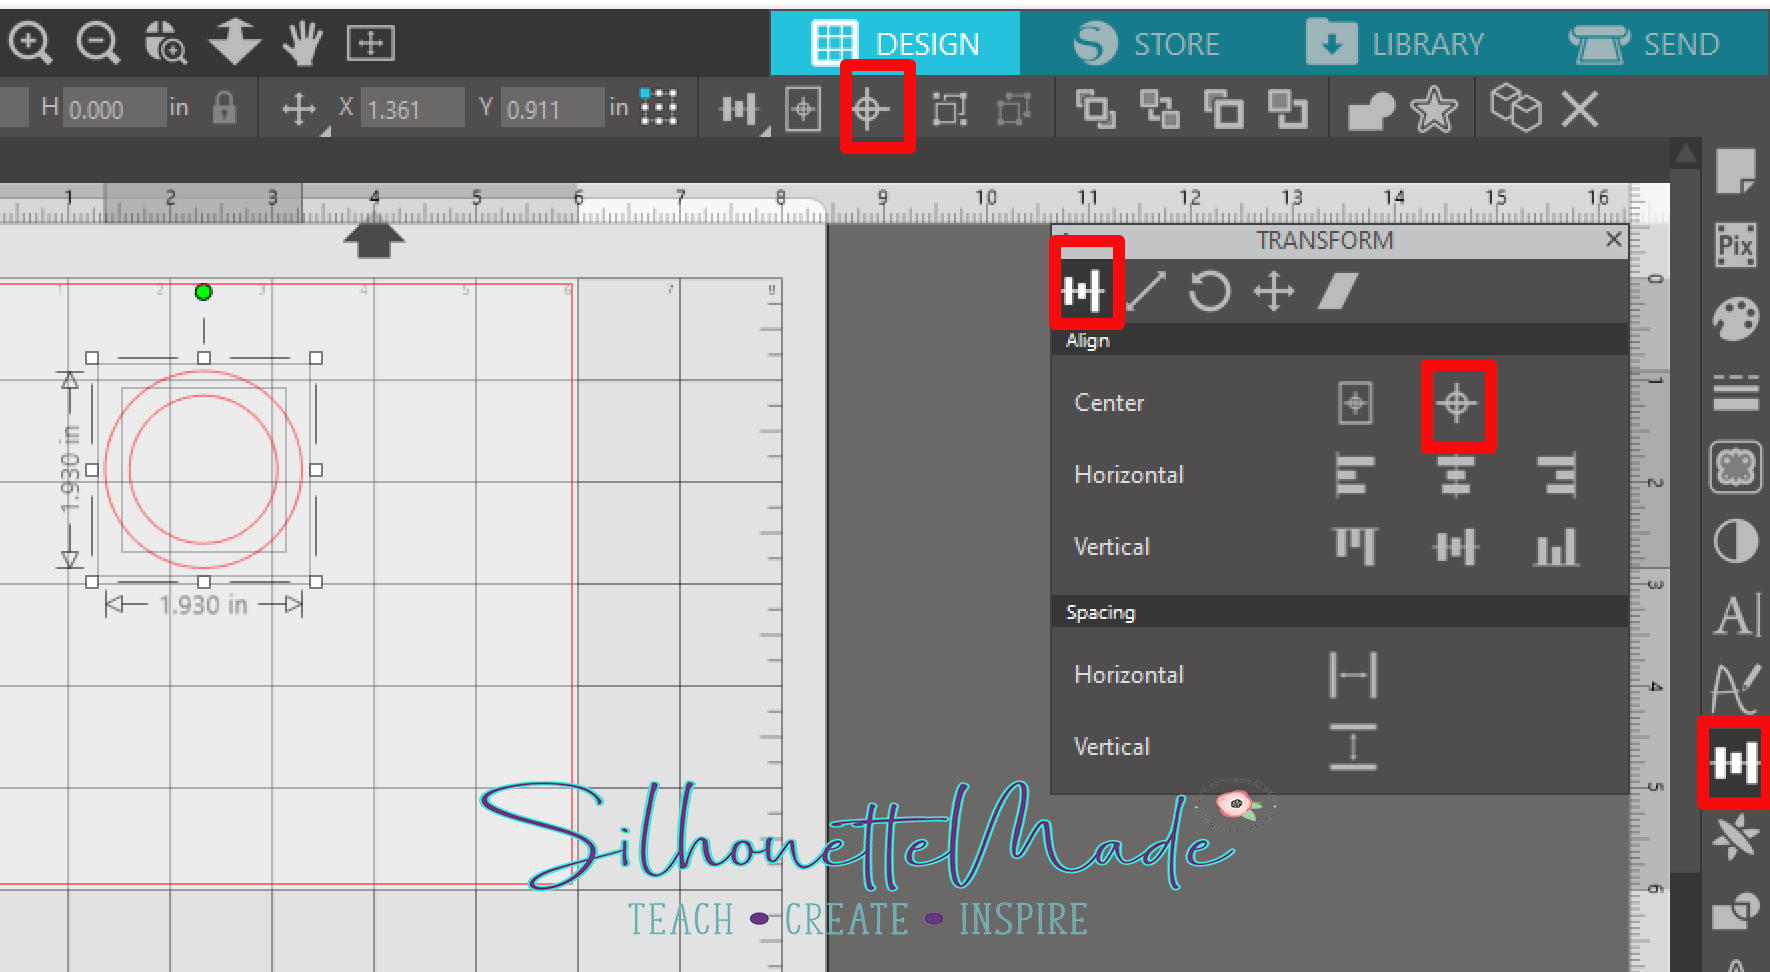
Next, I want to align the small circle so that it is centered inside the big circle. To do this select both circles and use the center tool. You can either use the tool on the Align tab of the Transform Panel or you can use the button located on the top toolbar. Once they are centered I group them together using CTRL + G. You can also group by right clicking and choosing group.
For my design I am just going to type out some text. This text is what is going to get foiled with the foil quill. I open the text tool and type my words. Then I open the Text Panel on the right toolbar and with my typed text selected I choose the font I want. For this design I’m using a font called Bollivia Rosilla. Since it is a script font, I weld the letters together to join them
Once the font is welded, I can position the words how I want them. First I select all the parts of the first word and group them. Then I do the same with the second word. Now I move the words around until I like their position. When I have them where I like them, I select both words and group them together.
Now we need to resize the words to fit inside the small circle on the “template” we made that represents the size of the button. to do this I just grab the corner and drag it inward until it is sized how l want it. Then I make sure it is centered to the circles by using the same center option we used above.
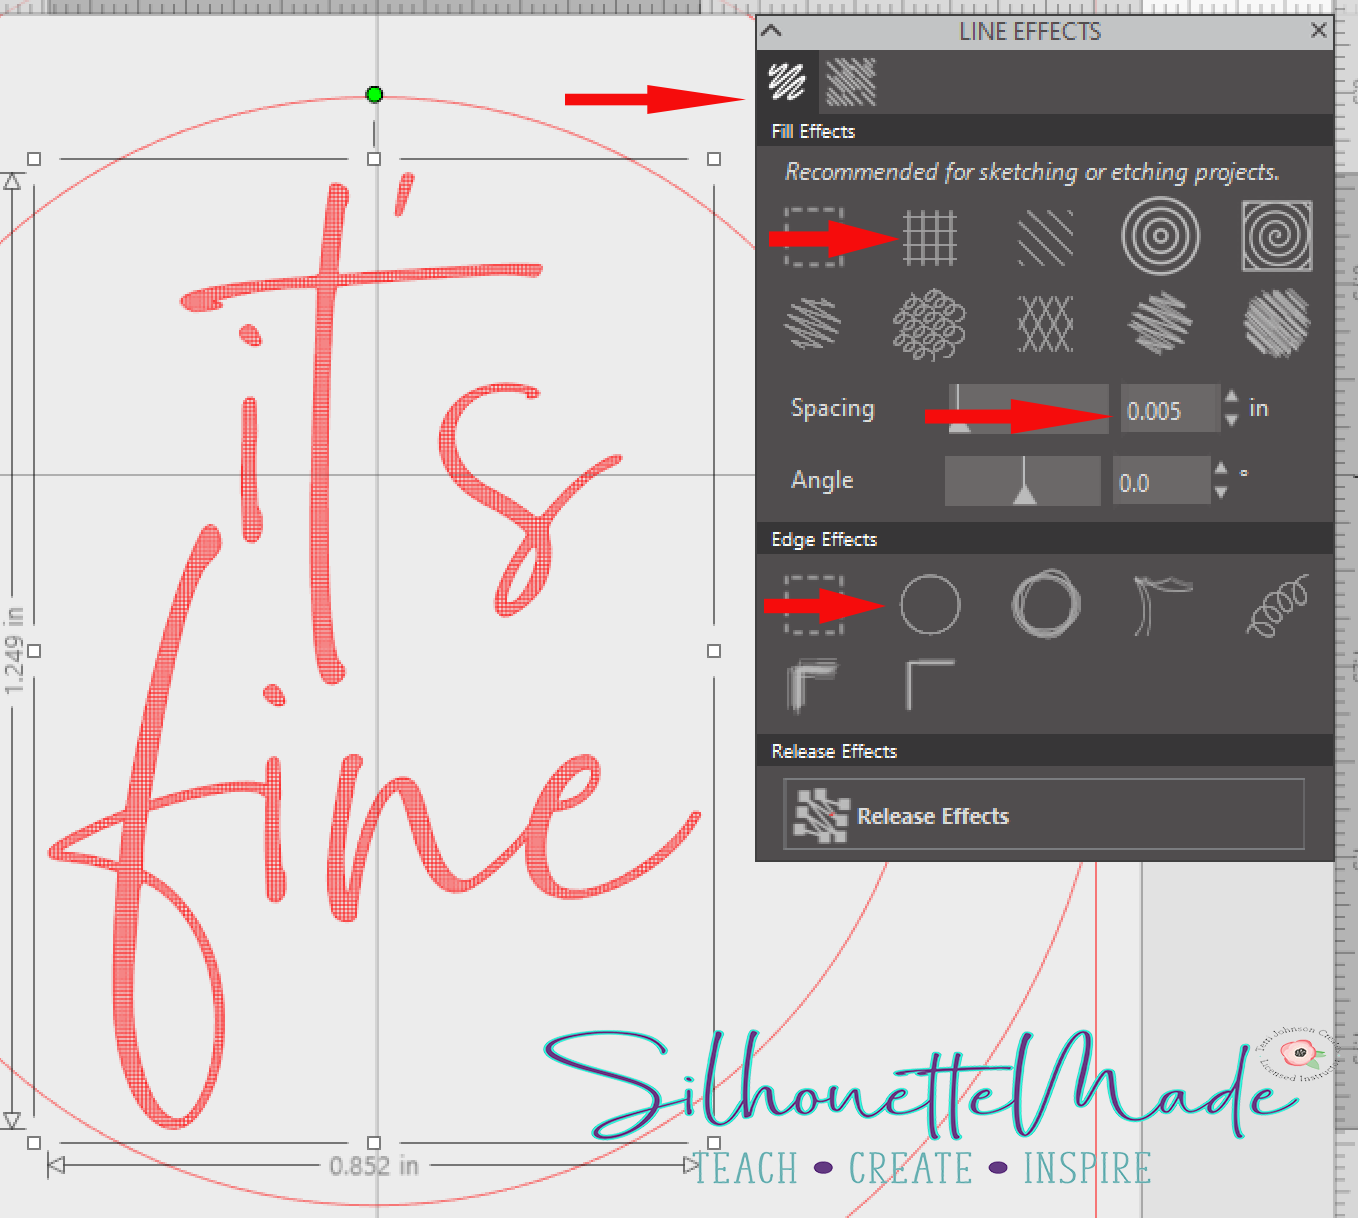
So now we need to set up the text to be foiled. Click on the text to select it and open the Line Effects Panel. In the Line Effects Panel, under the Fill Effects section, I choose the Grid fill option and change the spacing to 0.005 and under the Line Effects section, I choose the plain effect option. I do this so that there is an outer border to my text. The text is ready to be foiled.
Next, click on the send screen, set the Material to Cardstock, Plain, set the Action to Sketch, and set the Tool to Pen. Then click on the circle part of the design to select it and choose NO SKETCH from the options. The bold red line should go away. Now, click on the text and select SKETCH.
Since I am planning on making more than one of these buttons, I go back to the design tab and duplicate my design and fit it in the 6 x 6 area. Once I have them placed where I want, I select all word parts and group them together. Then I select all the circle parts and group them together. You will see why I do this in just a bit, but for something like this is makes it so much easier. Then I go back to the send screen.
Now that the file is completely ready to go, I need to set up my machine. Like I said at the beginning I’m going to use my Portrait, but this can be done on any machine. The first thing I’m going to do is set up the Foil Quill. It needs a few minutes to heat up before you hit send so I always do that first. Using the A adapter on the Medium point tip, I put it in the blade holder, put the little metal piece under the quill tip (so the heat doesn’t damage my machine), and plug it into an external charger to power it up and start heating it.
Next I take my cardstock and place it in the upper left corner of my mat and put the color foil I’m using on top of it. I tape the foil down nice and tight with washi tape. Once that is ready, I move the little metal piece from under the Foil Quill and load my mat.

On the send screen, verify the text is set to sketch and that there are bold red lines on the text. Then click send. This will start the foiling of the text. When it is complete DO NOT unload the mat, instead just carefully pull off the foil, unplug and unload the Foil Quill, and put your blade of choice in the holder.
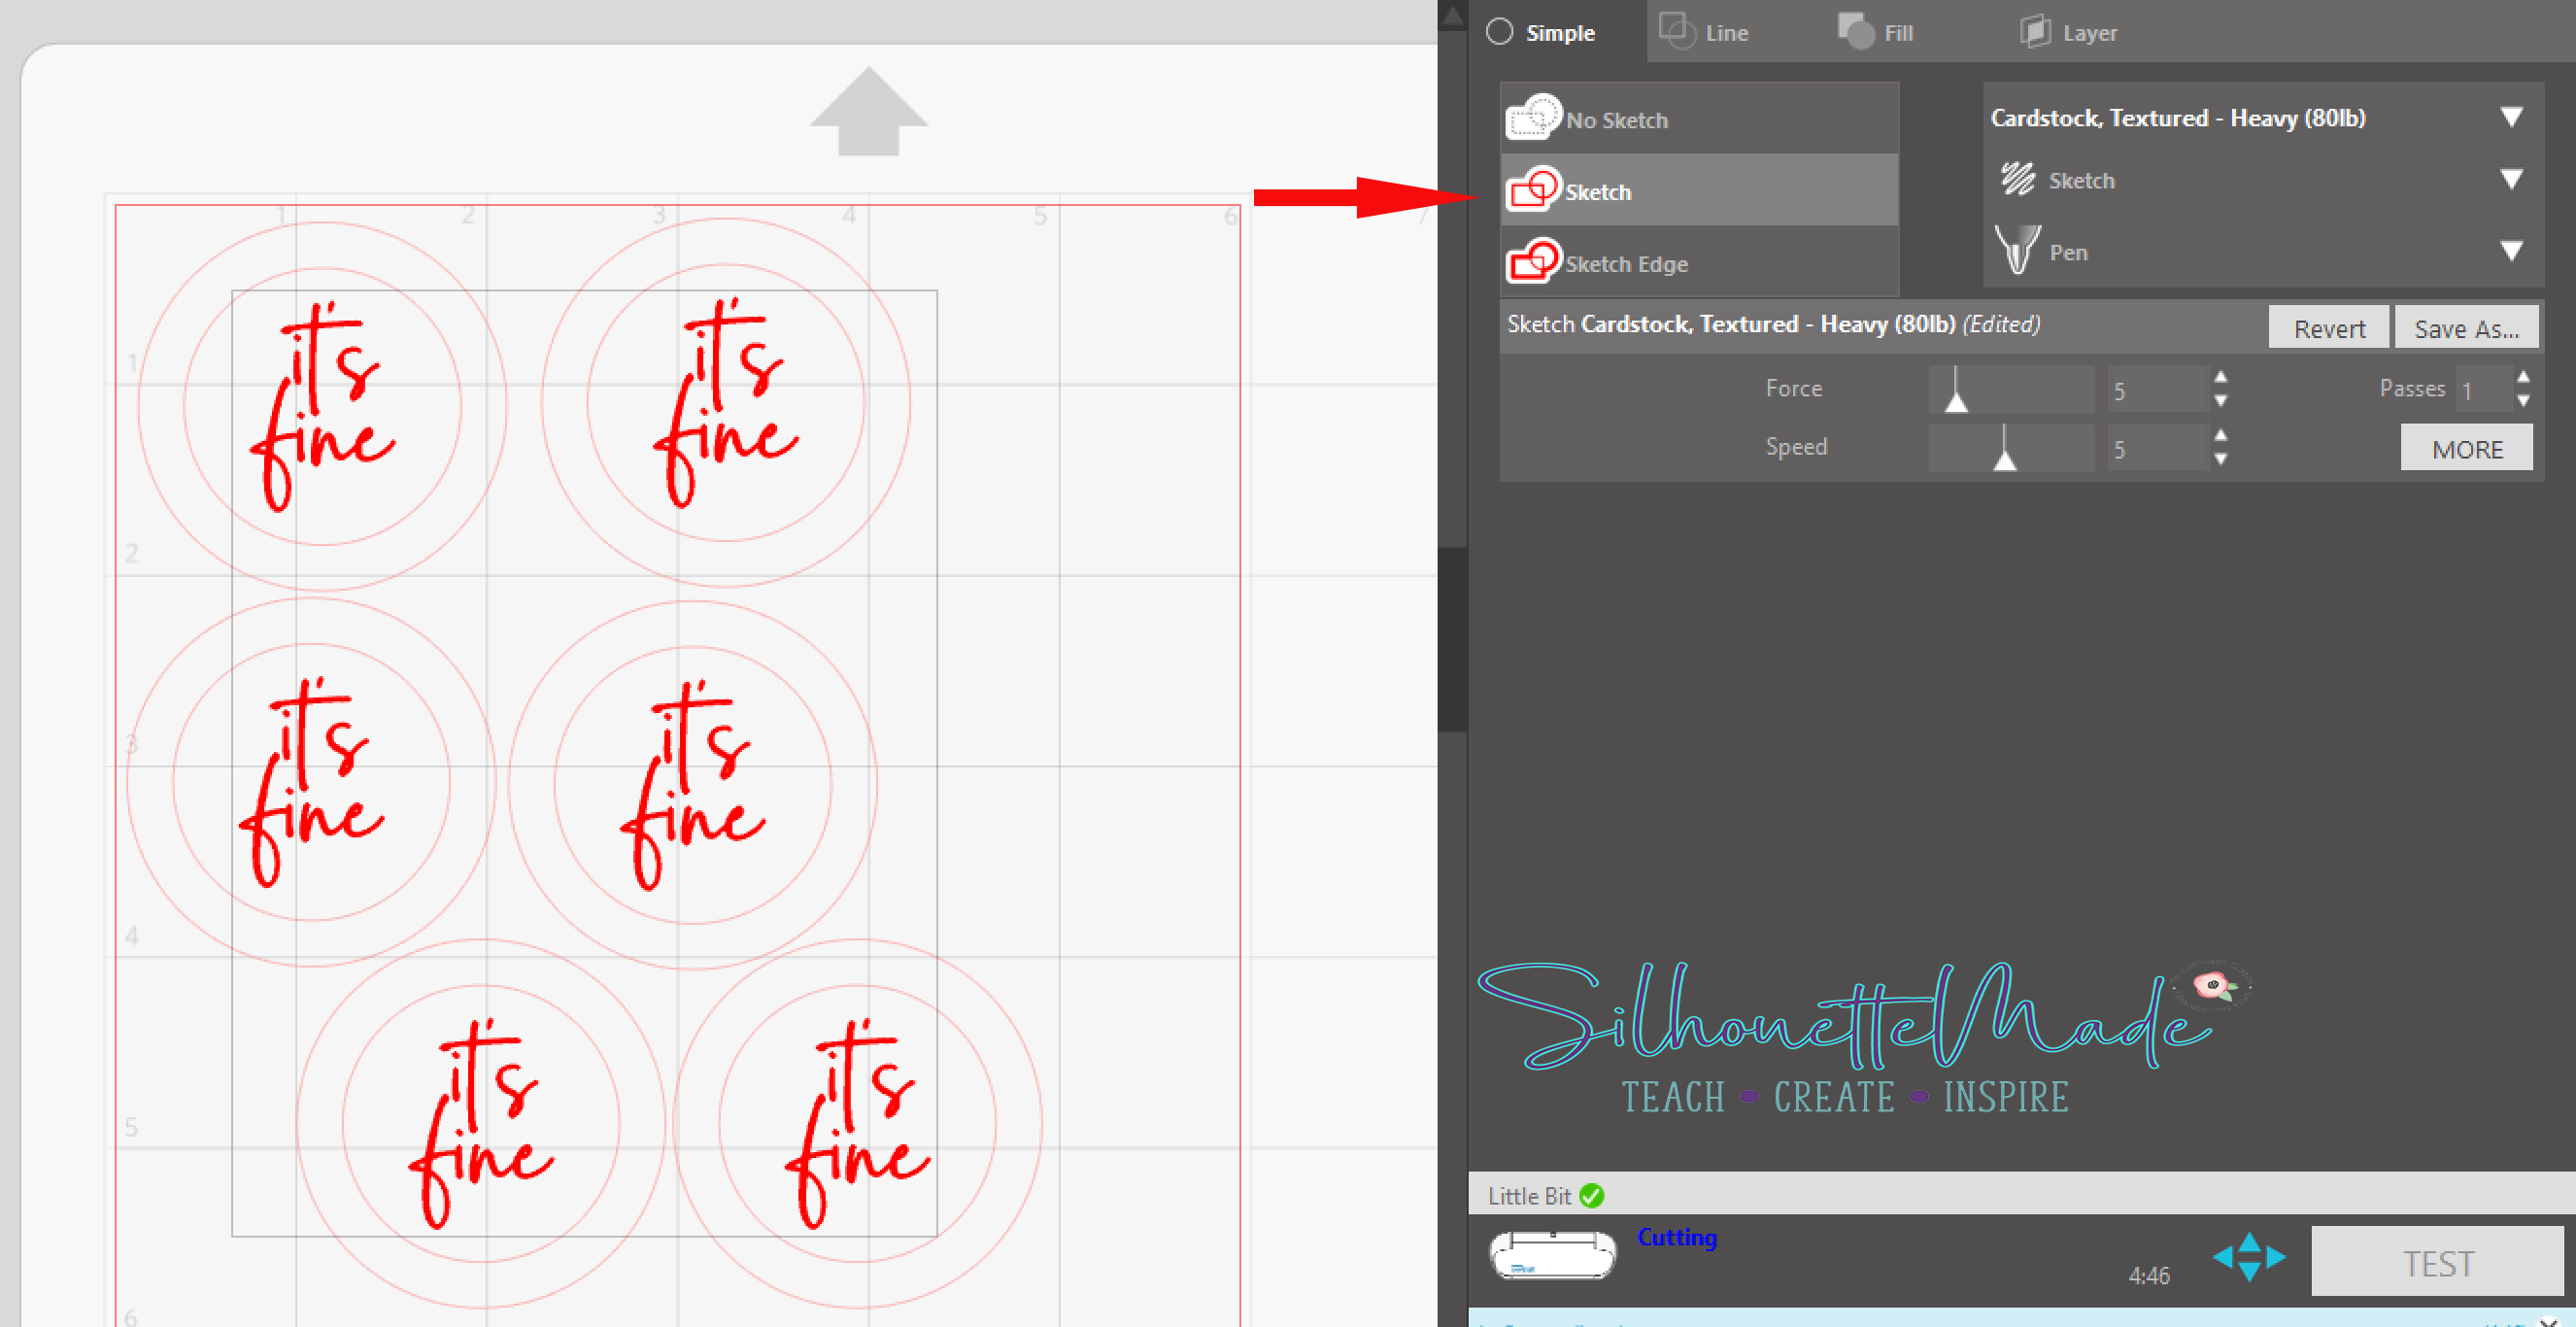
Once the foil is removed and the blade installed, you need to set your design to cut the circle and not the words. Select the words and then choose NO CUT from the settings. Then select the circles and set them to CUT. Now remember earlier when I had you group the circles together as a group and the words together as one group….this is why, it’s quicker to set them to cut/no cut when they are grouped.
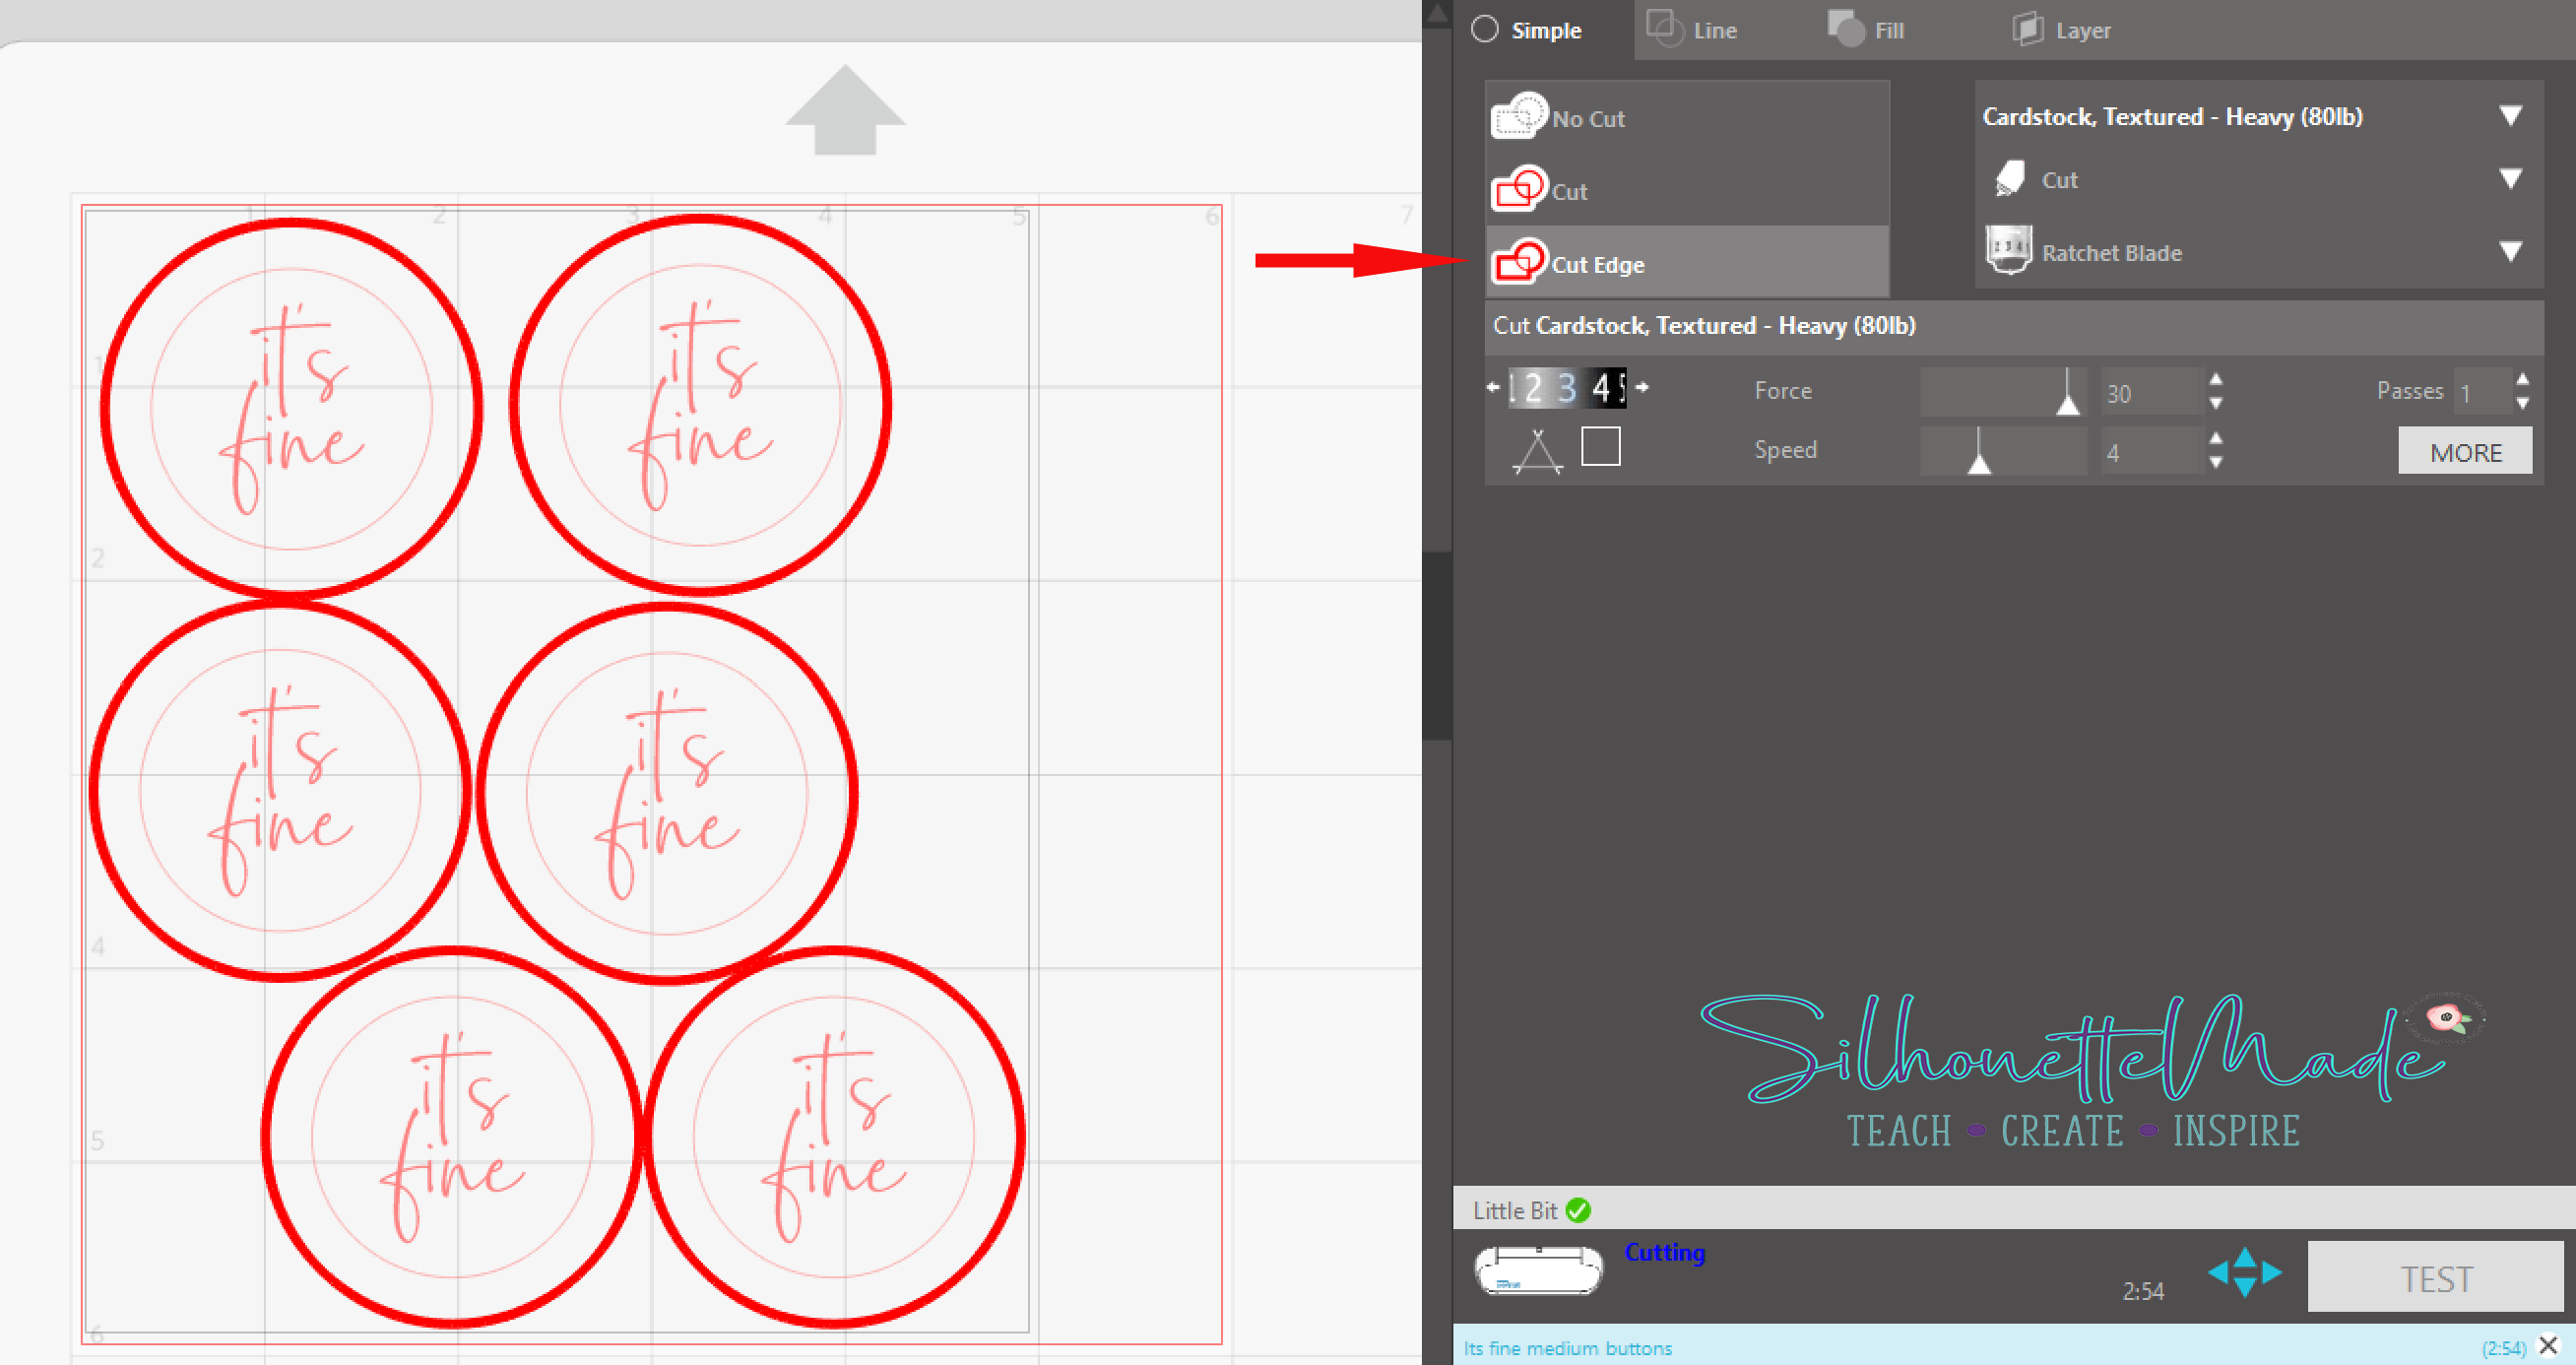
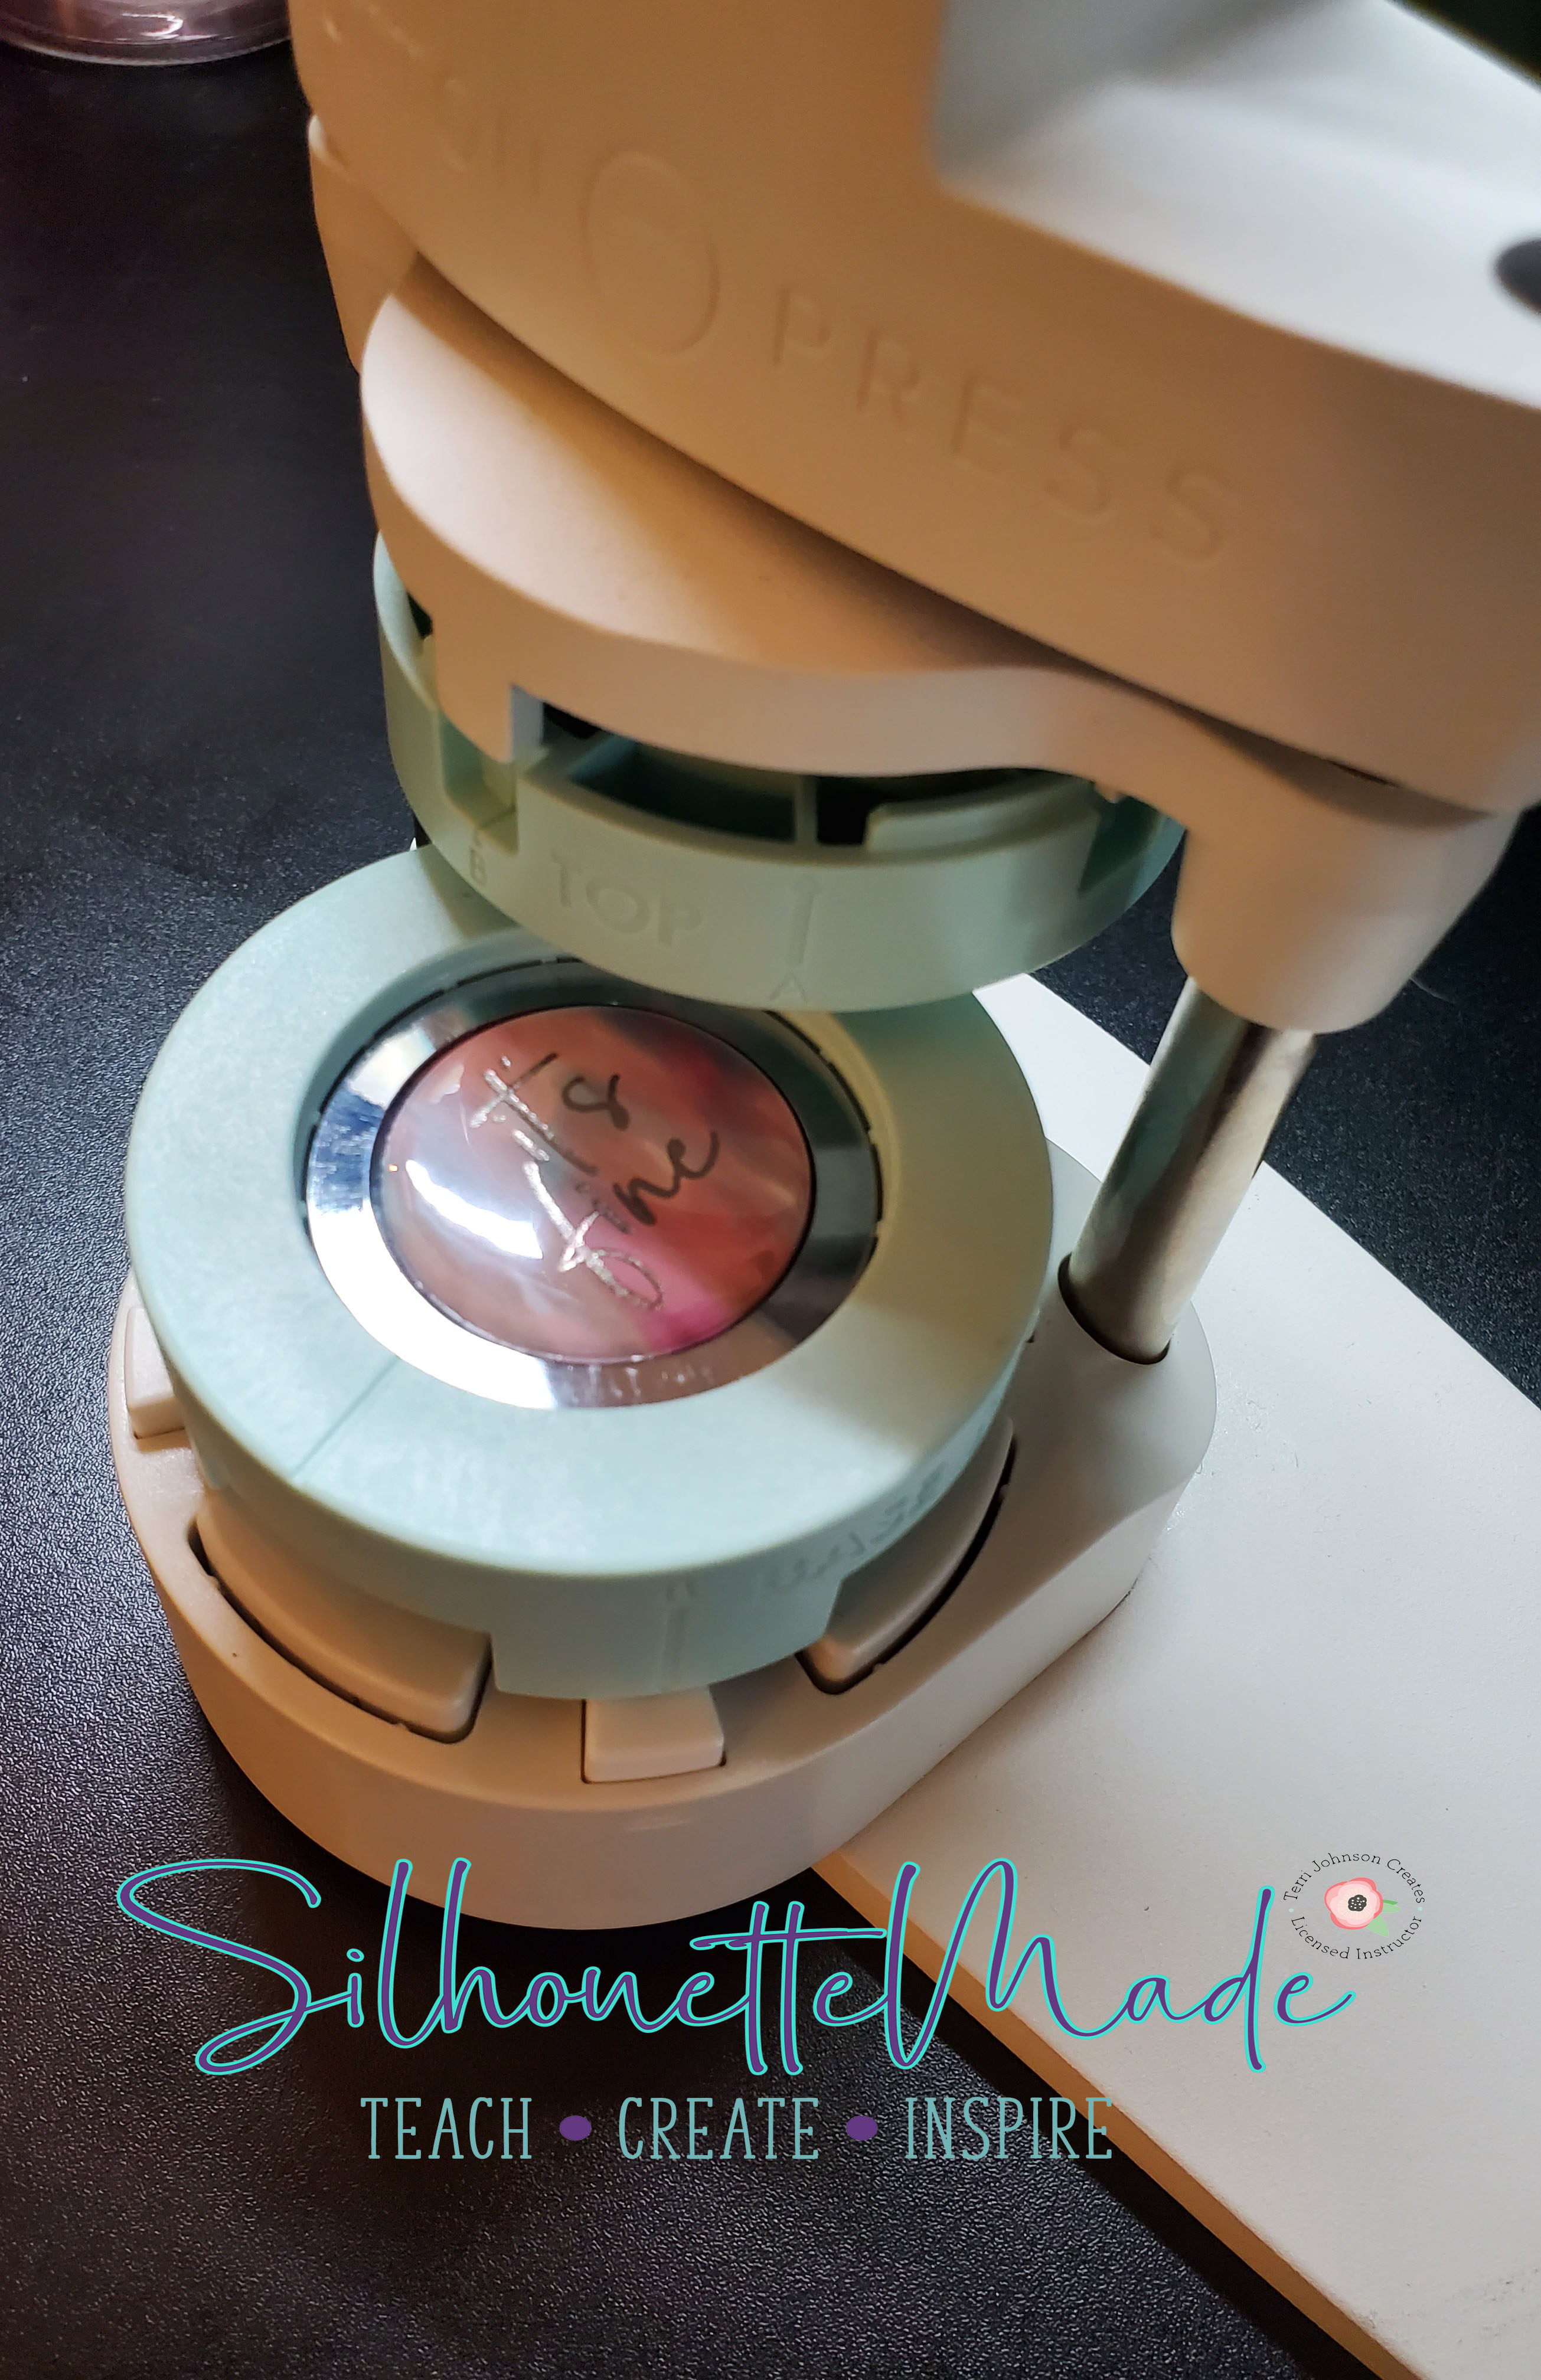
Now that they are set up so the circle will cut, send the design to the machine. Once the machine is done cutting, unload the mat. and pull off the cardstock. Now it’s time to make the actual button. I am using the medium size buttons for the We R Memory Keepers Button Press. I am so in love with this tool. It is so much fun!
The first thing I want to do after installing the button plates for the size I’m using, I make sure that the arrow on the press is lined up with the A on the top and bottom plate (bottom plate shown below).
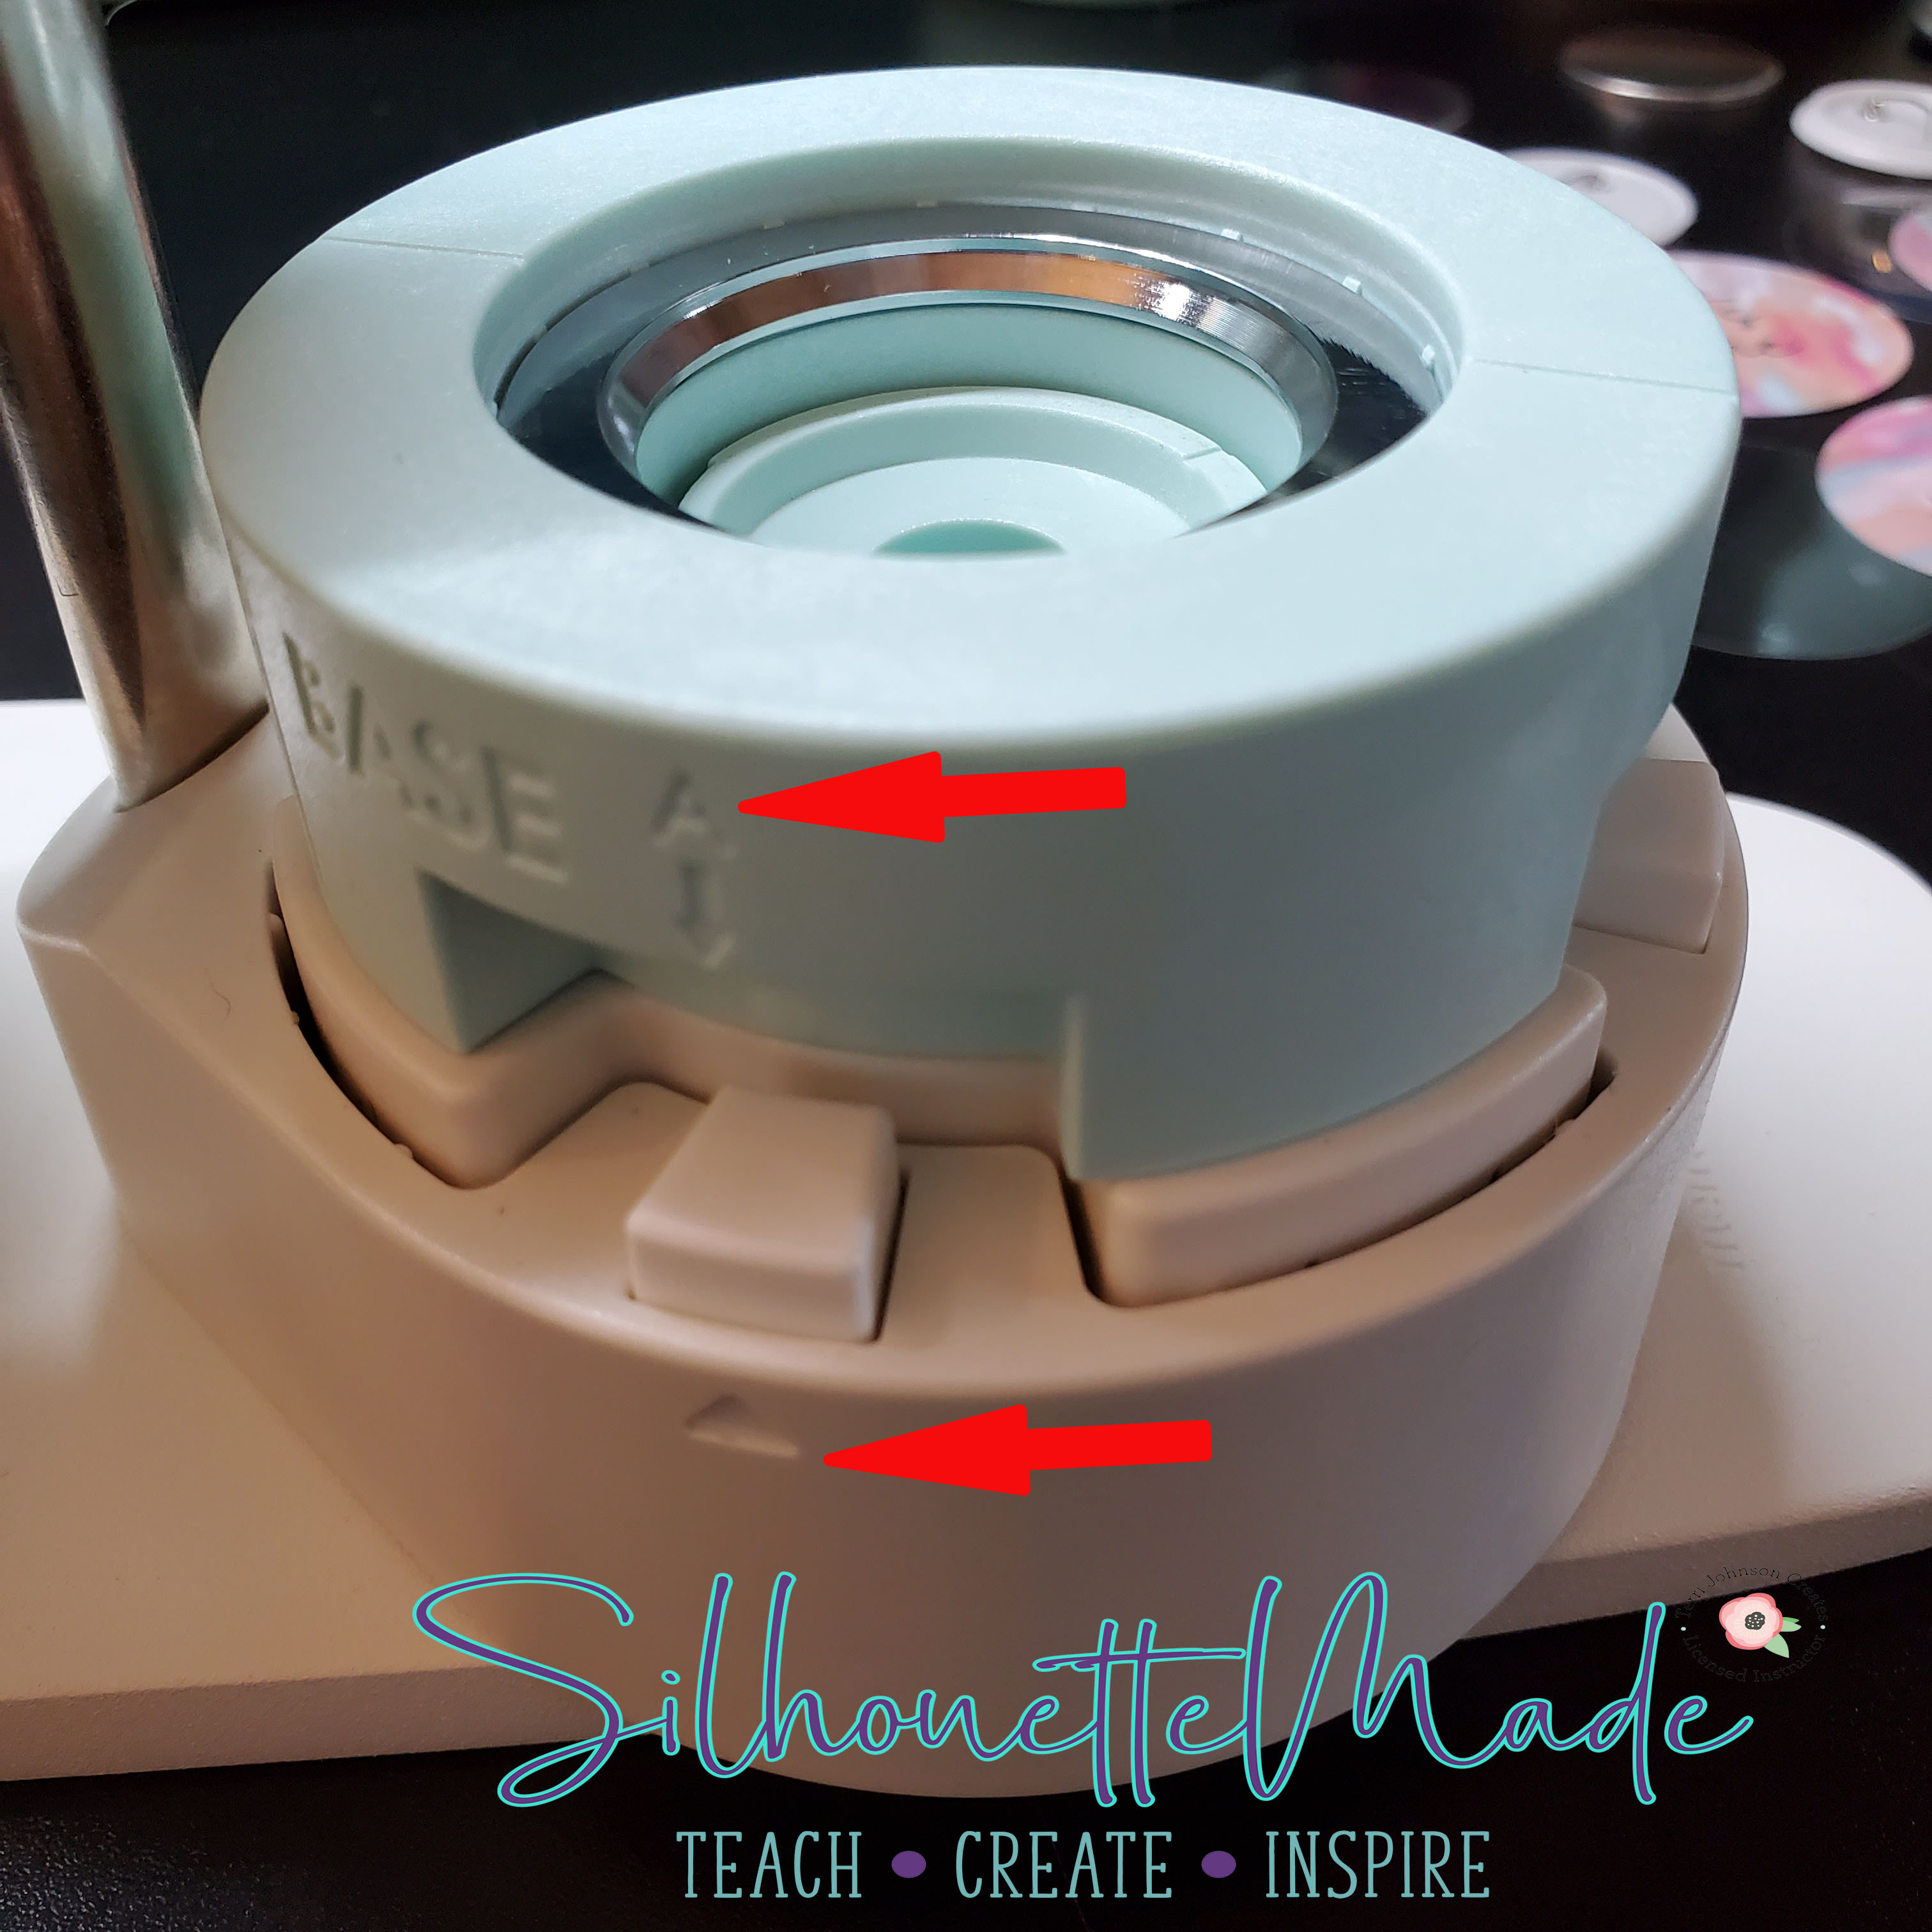
Then I put in the top button part – this is NOT the part with the pin back – into the bottom part of the button press. On top of that I place one of my cutouts. I align the middle of the cutout with the two lines on the side of the plate. This will ensure that the pin back lines up the correct way on the button when it is completed. Then I place one of the clear acetate circles on top of my cutout.
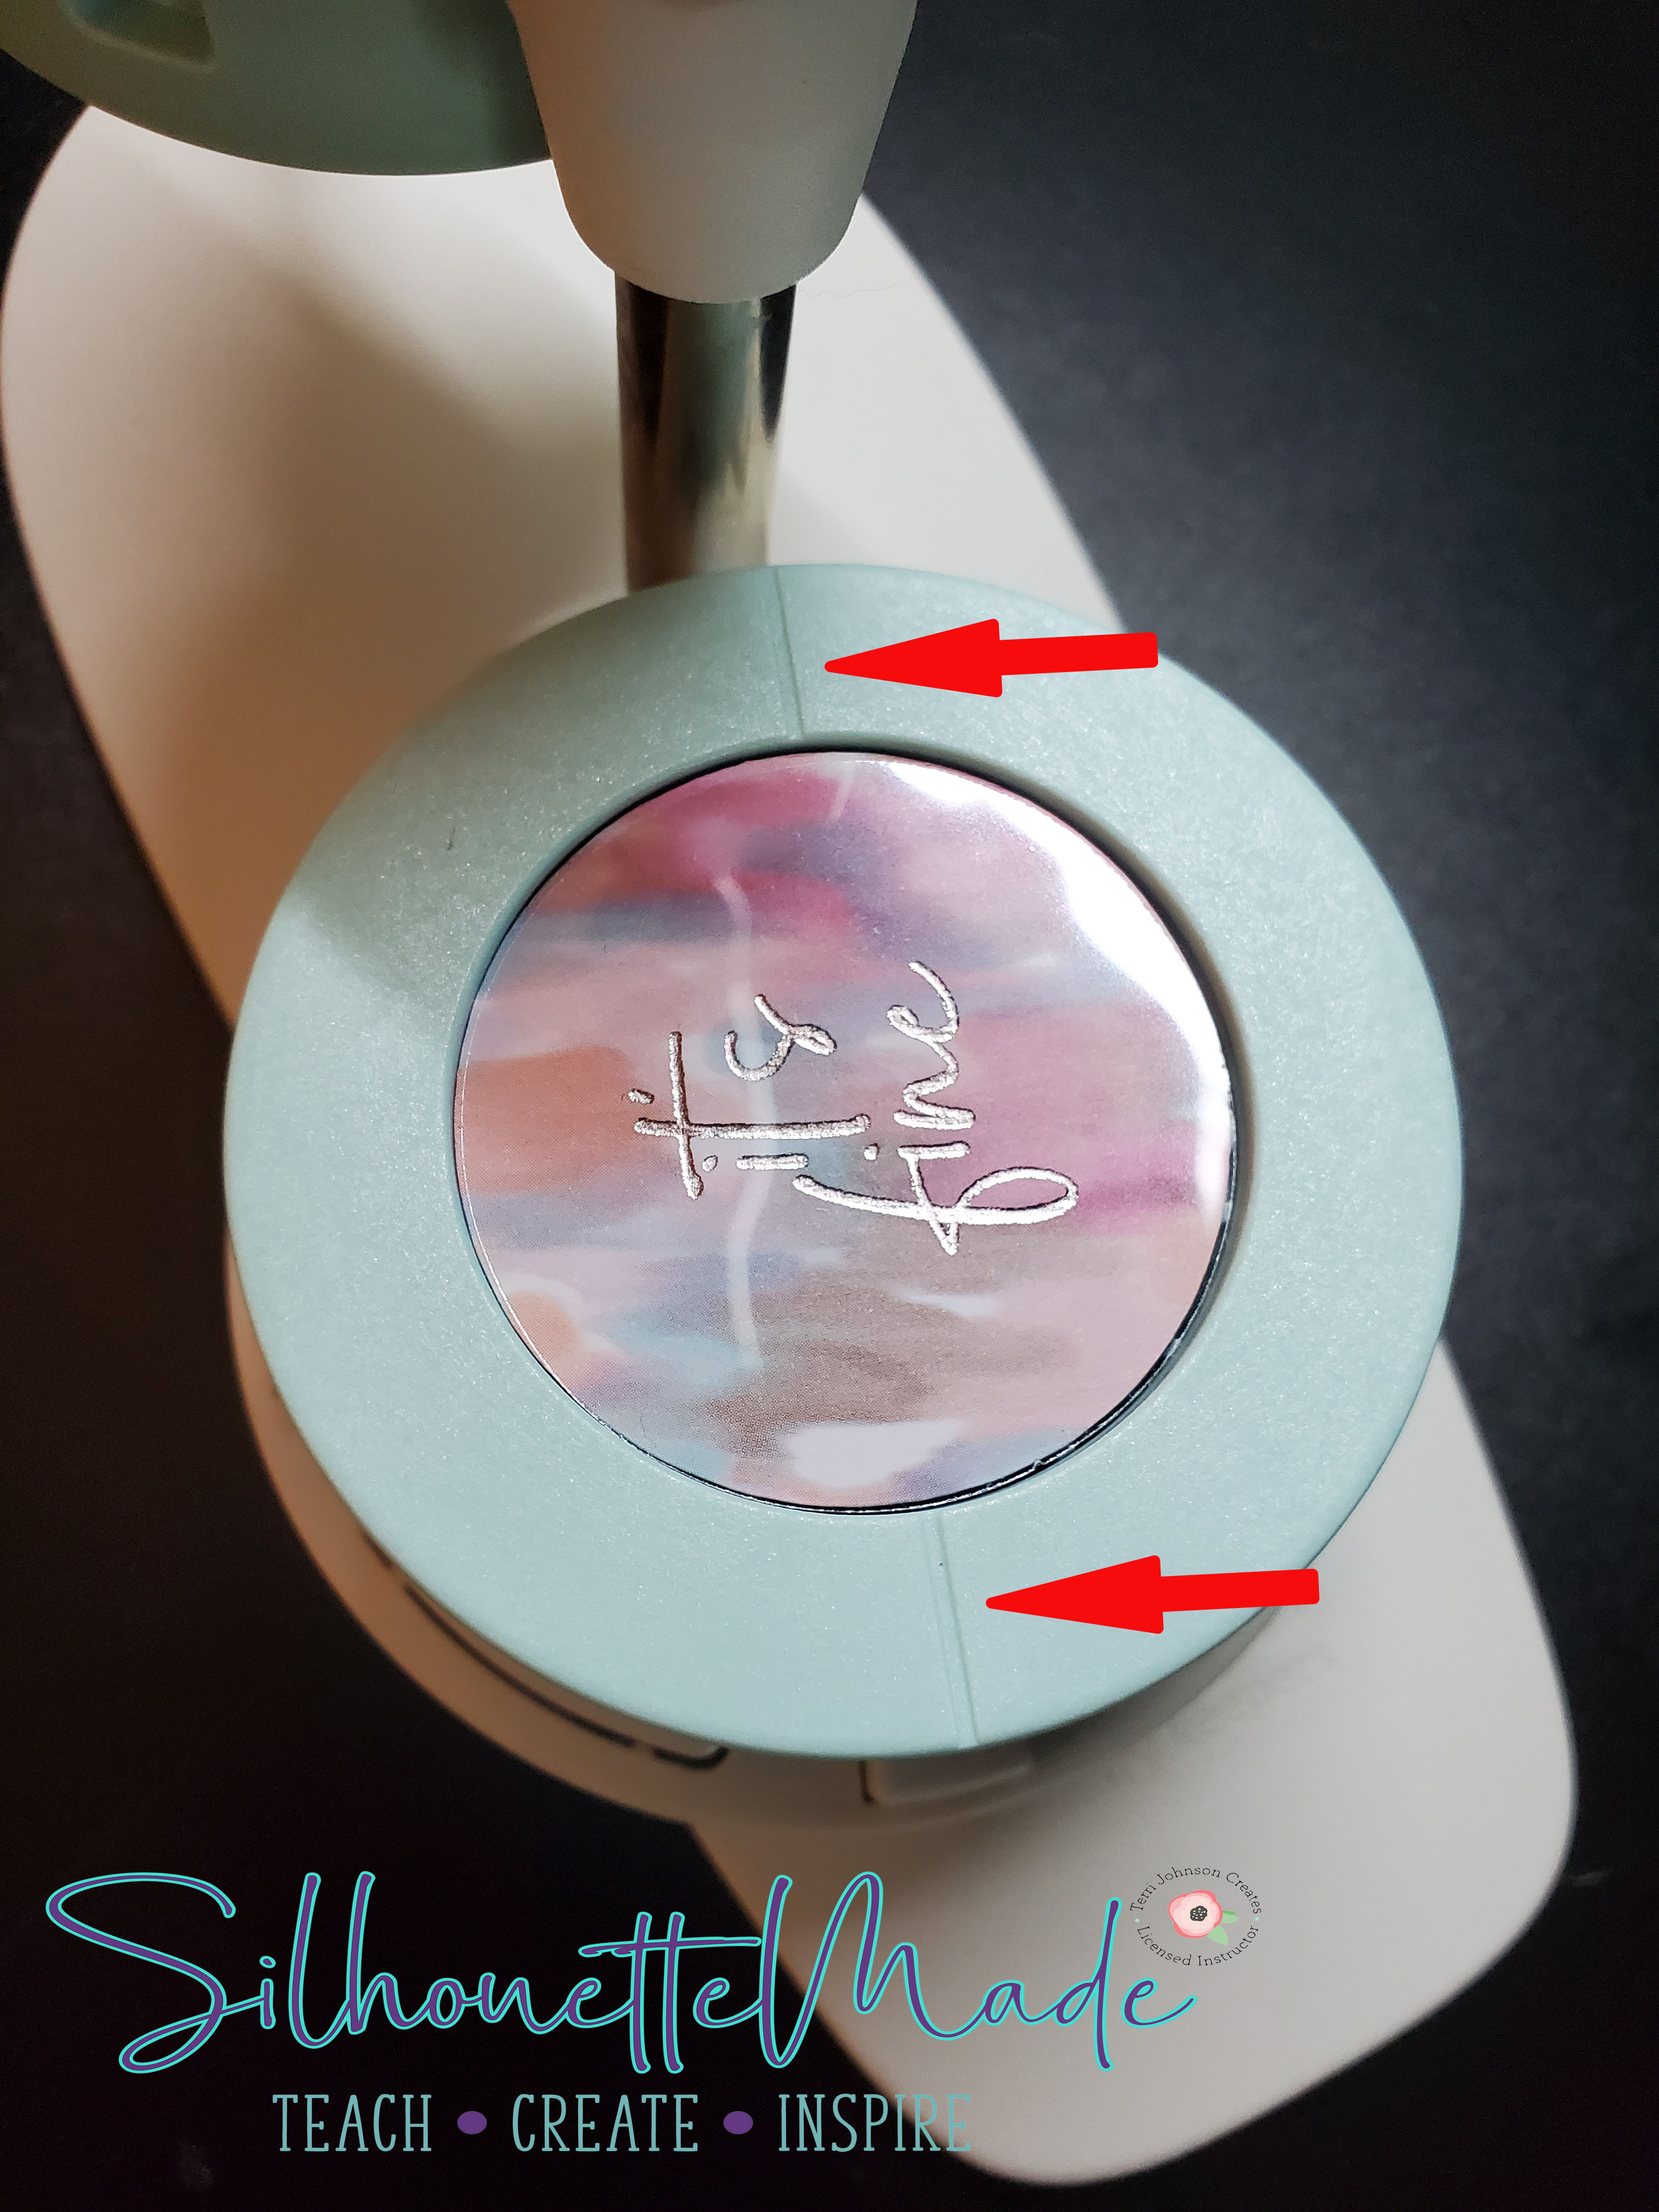
Then slide the bottom plate around so it is directly under the top plate. I verify again that they are both set to A. Then press down on the handle with a bit of force to “create” the top part of the button. Once that is done, slide the bottom plate back around and twist the top and bottom plate to B. When they are set on B, you can put the pin-backed part of the button in the bottom plate. Make sure to line up the pin-back with the same two lines you used to center your button design.

When it is positioned where you like it, slide the bottom plate back around, verify both the top and bottom are set on B, and press down on the handle like you did before. You have now made a button. Slide the bottom plate back out and take out your button!
I am having such a great time making buttons. I have endless ideas. My kids even come to me with ideas for buttons that they want me to make them.
I would love to see your projects. You can post photos or ask questions on my Facebook page or in my group:
www.facebook.com/SilhouetteMade
www.facebook.com/groups/SilhouetteMadewithSarah
To share or save this post please pin the image below.
