

I love cutting stencils with my silhouette. I use them for so many different projects. I even cut them for my 5-year-old to trace with for her art. The stencil I am making for this post. I used for my newest Artesprix Design Team blog using a decorative metal panel. It will be posted on the Artesprix.com blog.

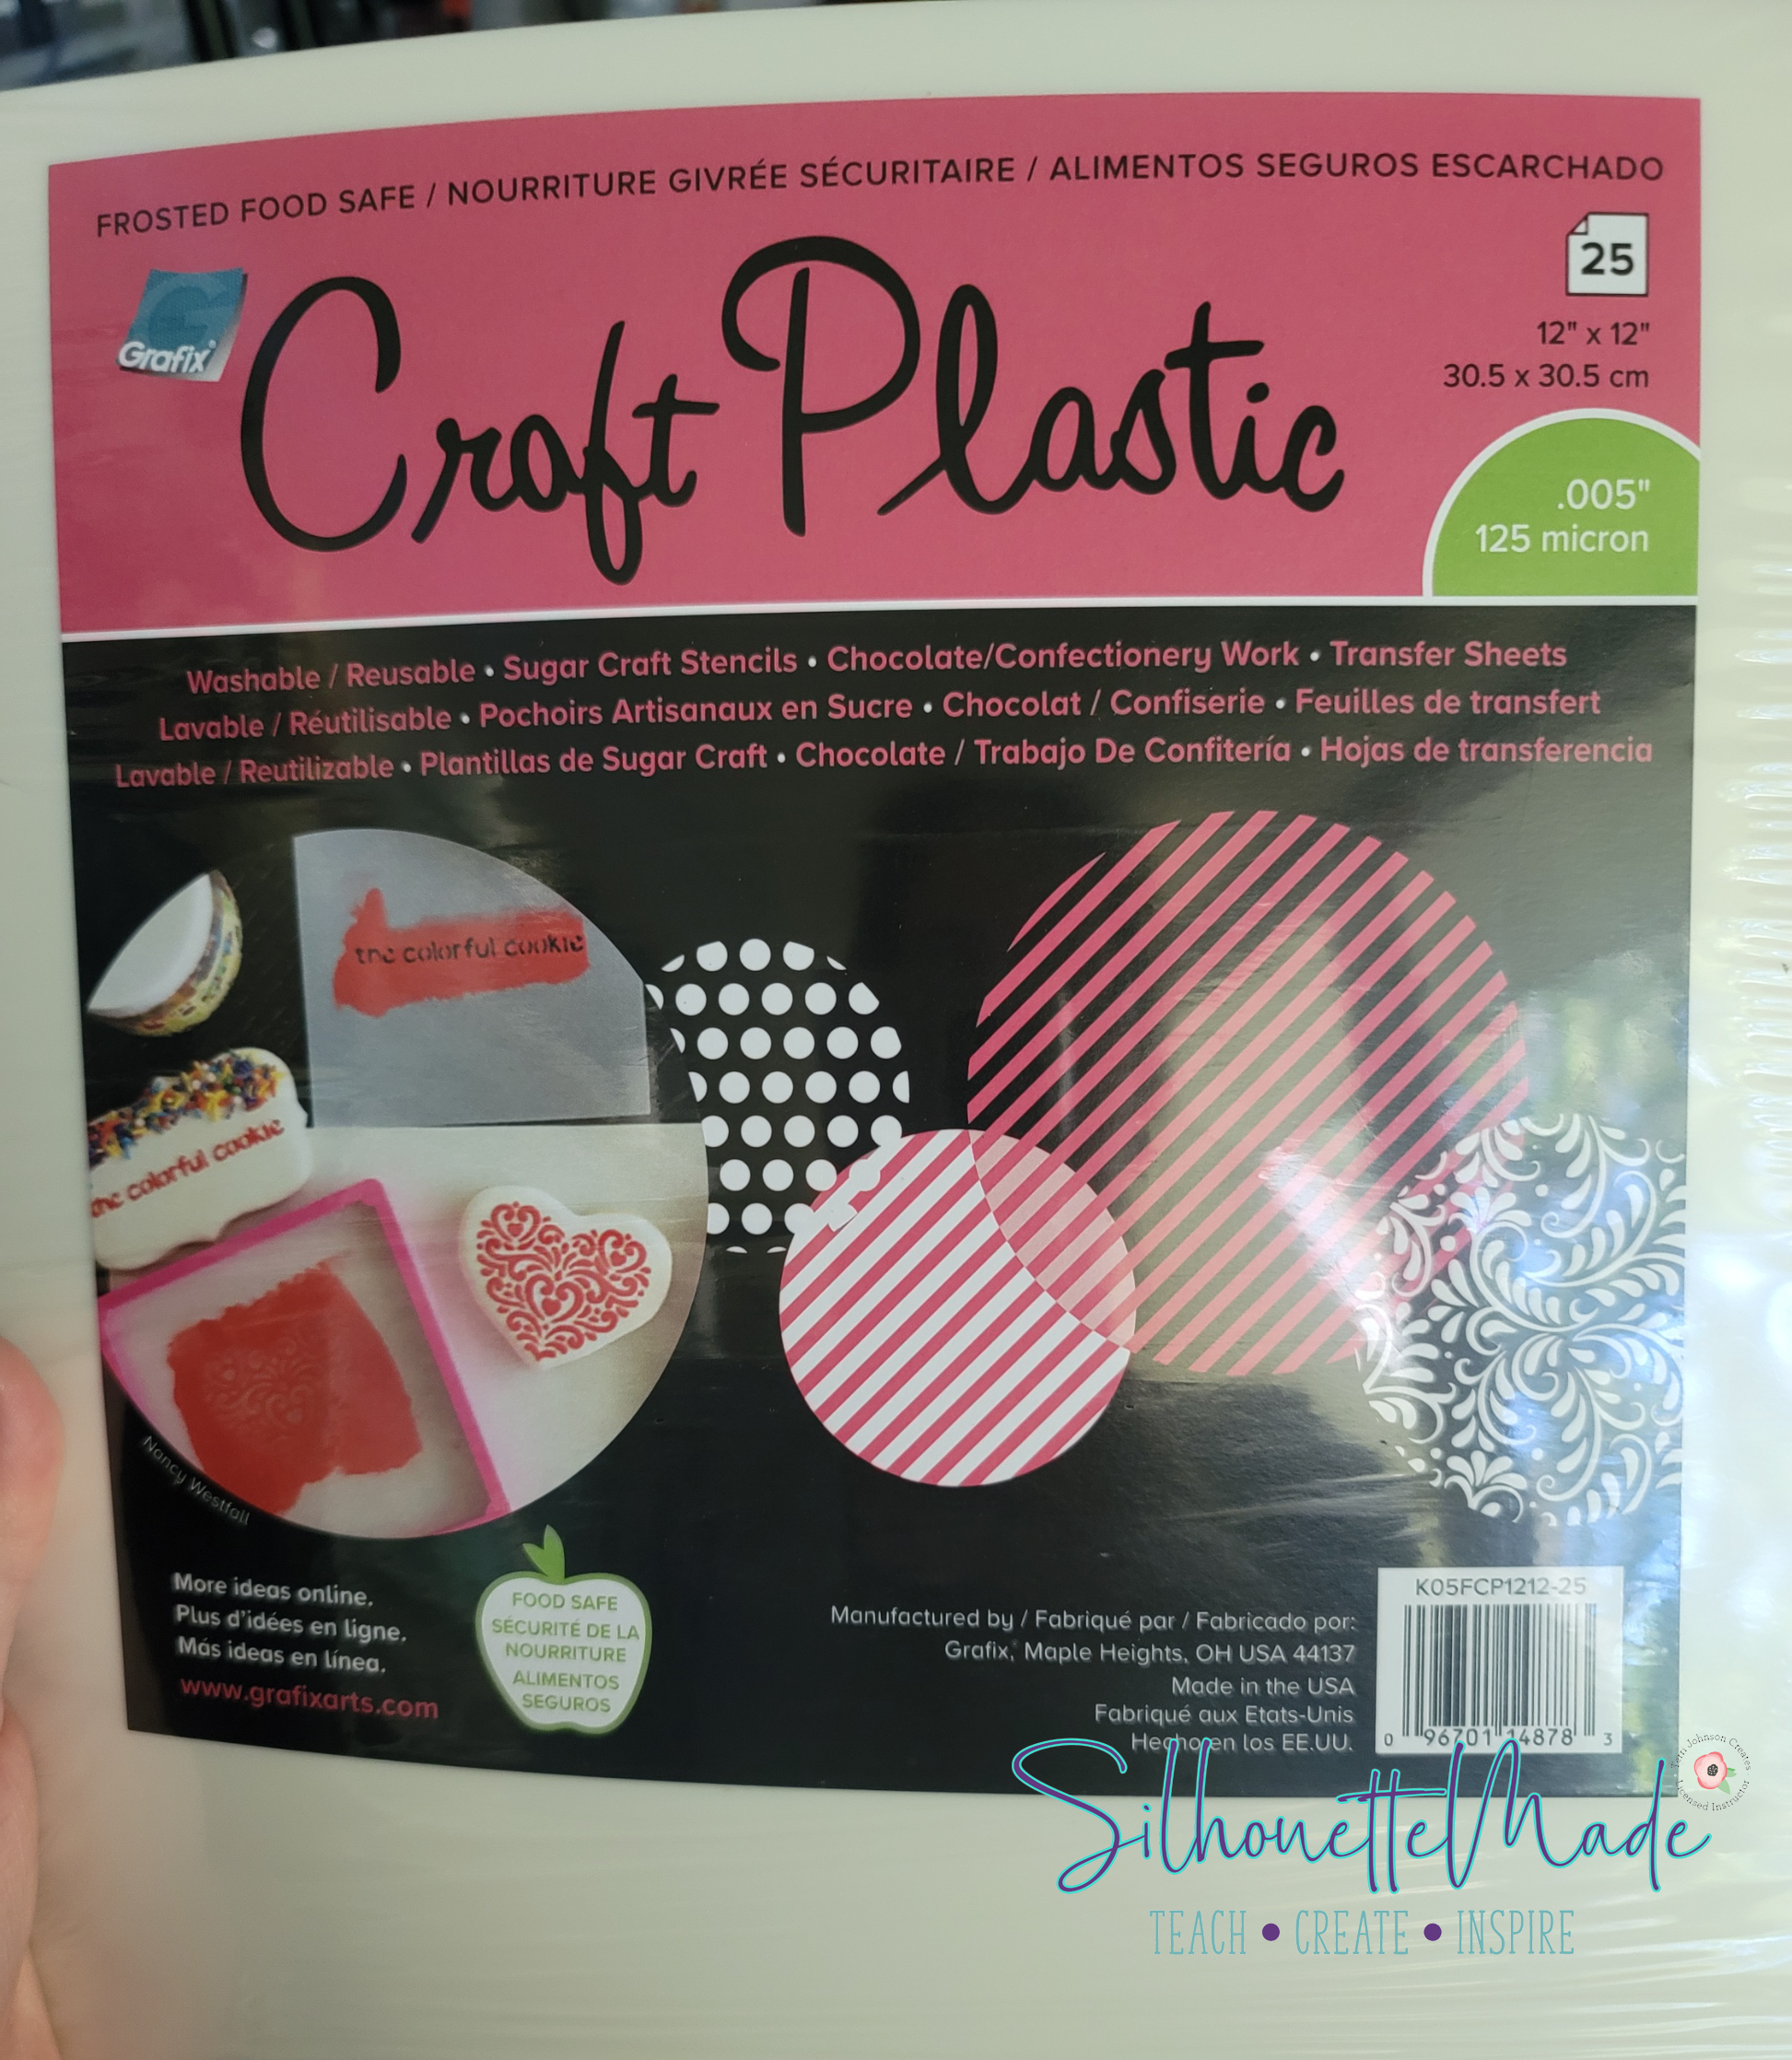
When making stencils, I like to use 5mil craft plastic. This is a food safe plastic so it can also be used for cookie stencils. It is 5 mil so it is not a very sturdy (although it holds up well) plastic. I have also cut the 7mil (.007) craft plastic, but it is a little more difficult to cut. and will take a bit of testing to get the settings right.
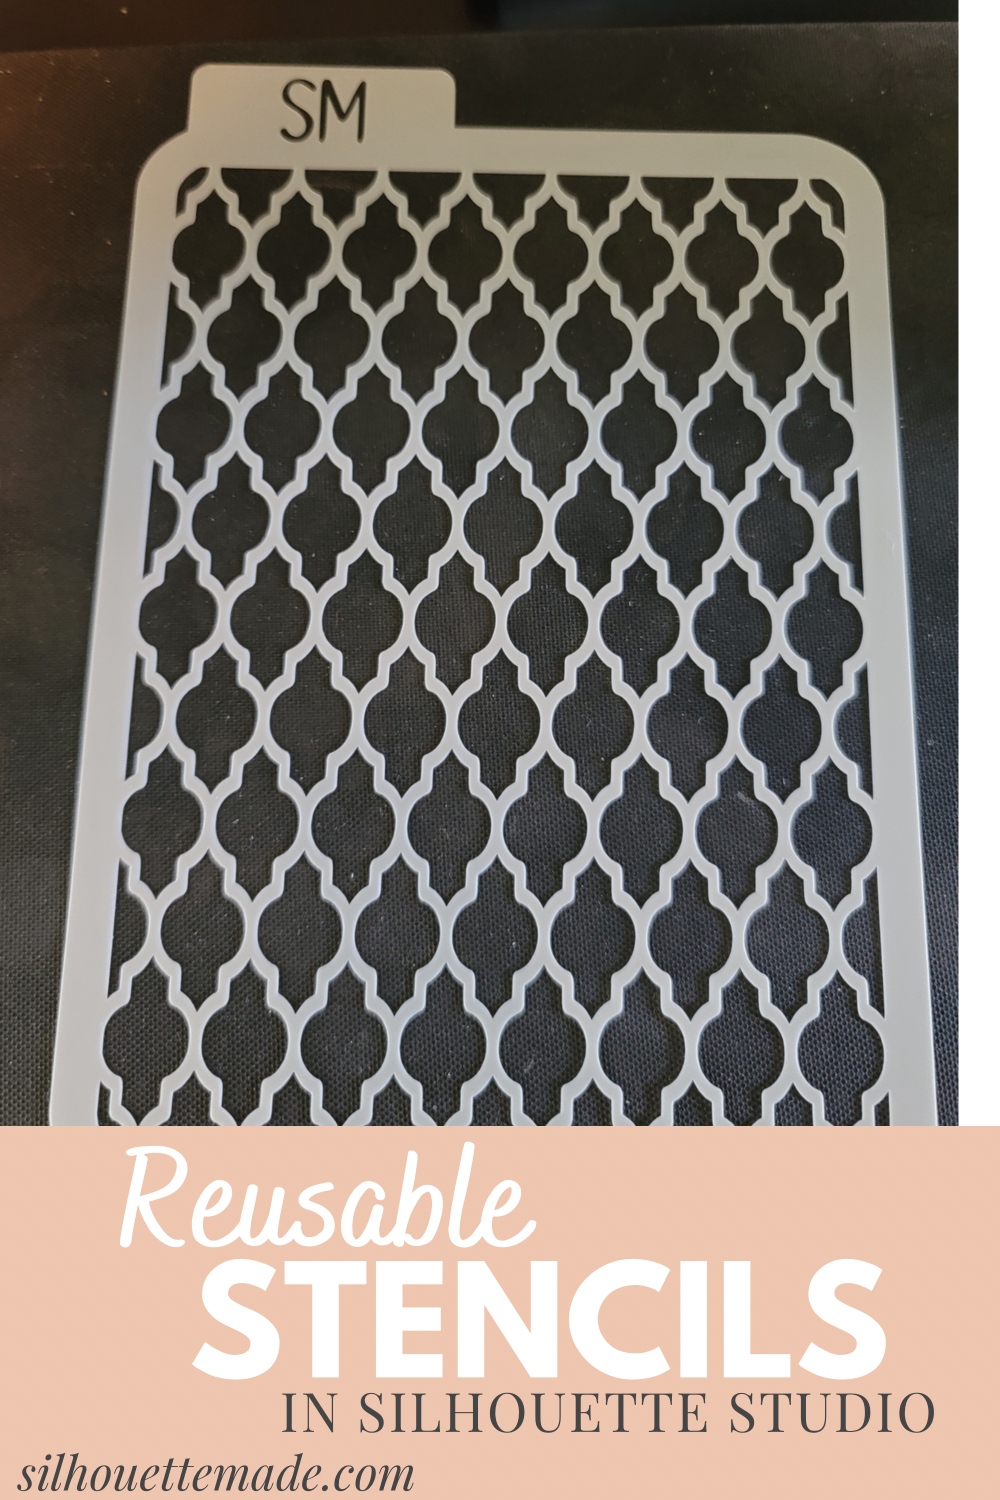
The design for this stencil came from the Silhouette Design Store. It is Design ID # 49889 by Rivka Wilkins. You can create your own stencil from scratch, but sometimes for a quick project I prefer one that is “ready-made”. I have purchased several backgrounds like this and have created many different stencils.
I created a stencil for one of my first Artesprix Design Team projects, the Poly Necktie. While I don’t go into detail about the stencil in the post, I used it for the coffee bean background.
Creating the stencil
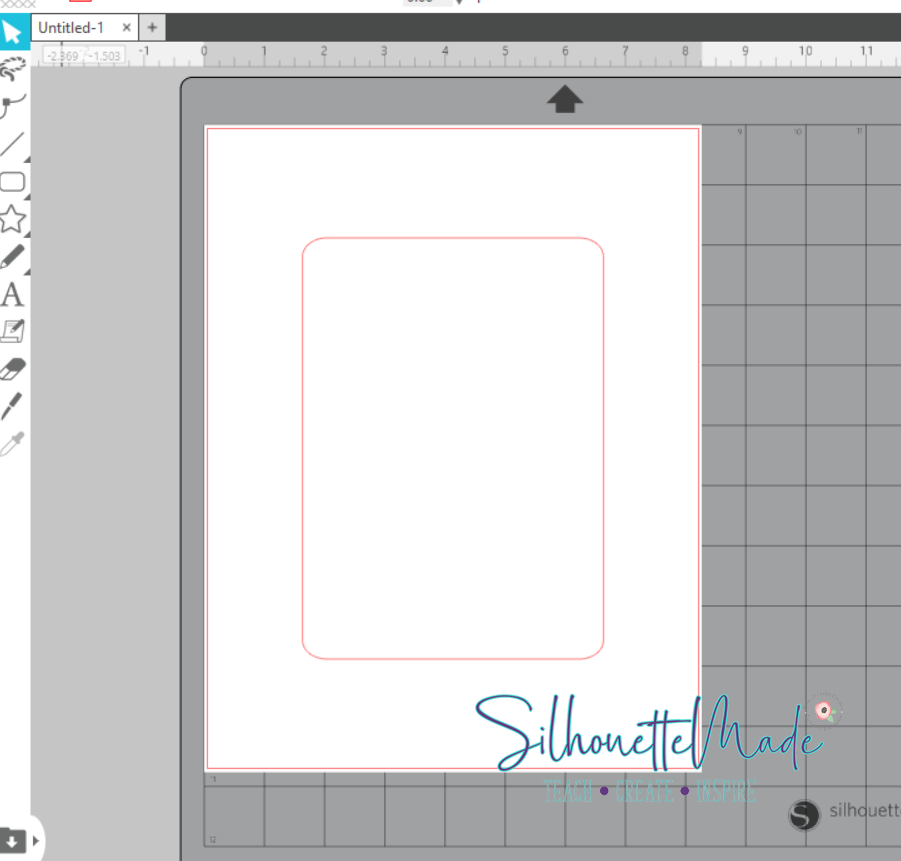
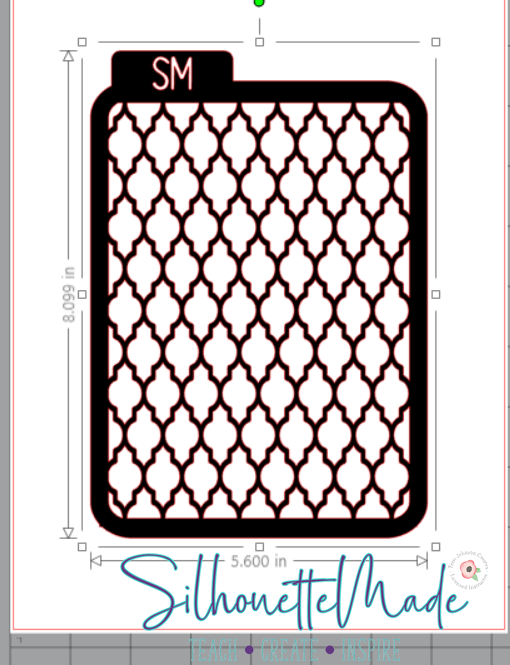
This stencil is going to be 5×7. Using the drawing tools on the left toolbar, make a rounded rectangle and size it to 5×7 using the transform panel.
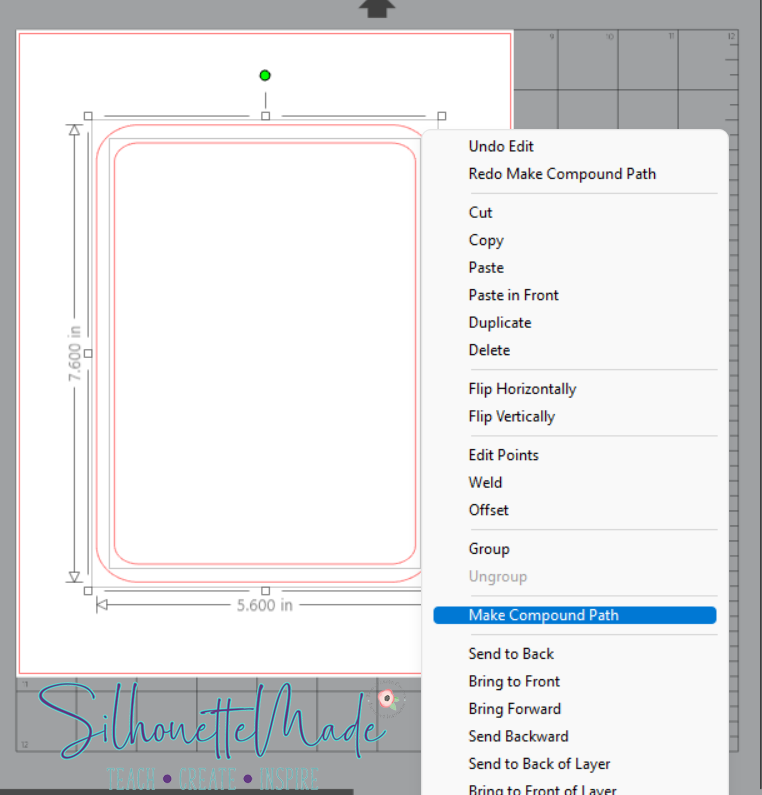
Once the rectangle is sized, open the offset panel, and do a 0.300 offset. When you have completed the offset, select the offset and the original rectangle and make them a compound path. This will make them a frame. If you fill it with color you will see that the “center” remains empty.
After making the rectangles into a frame, open the stencil design, and size it to fit between the two rectangles. You want it to slightly overlap the inner most part of the frame. This is because you want it to be seamless when you weld it to the frame.
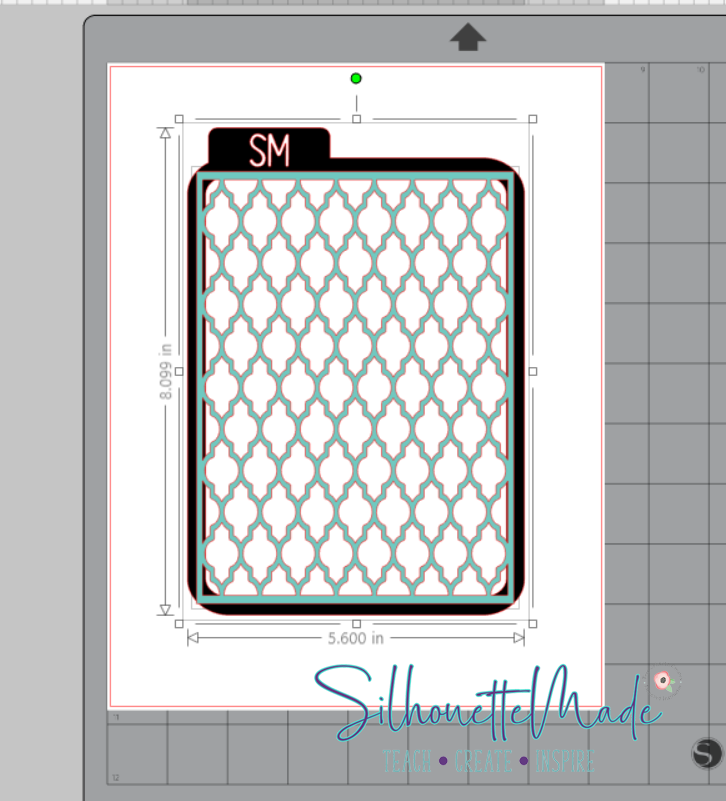
When it is positioned and sized, select both the frame and the design and weld them together. If the shapes were filled with different colors, they will combine into one color after they are welded. Now your stencil is ready to cut.
Cutting the Stencil
I created my own custom cut settings for this material. I have tested these settings with this material extensively and know they work well. If you are using another brand or different thickness of material these settings might not work as well, but they will give you somewhere to start in your testing.
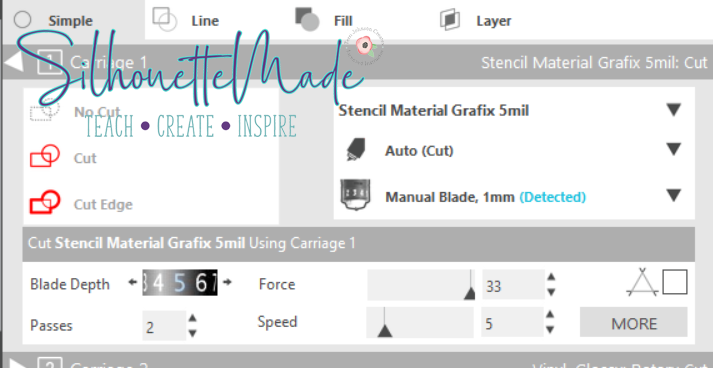
Place the material on the mat, load your machine, and set your cut settings. Make sure that there are bold red lines around your design to show where the blade will cut. If there are not bold lines, click on the stencil design on the mat and choose CUT from the settings on the right. Now send the file to the machine to cut.
Once it is done cutting, but before you unload the mat, check to make sure it cut through. If it has not, send it through to cut again. If you unload the mat first, you will not be able to reload and recut in the same spot.
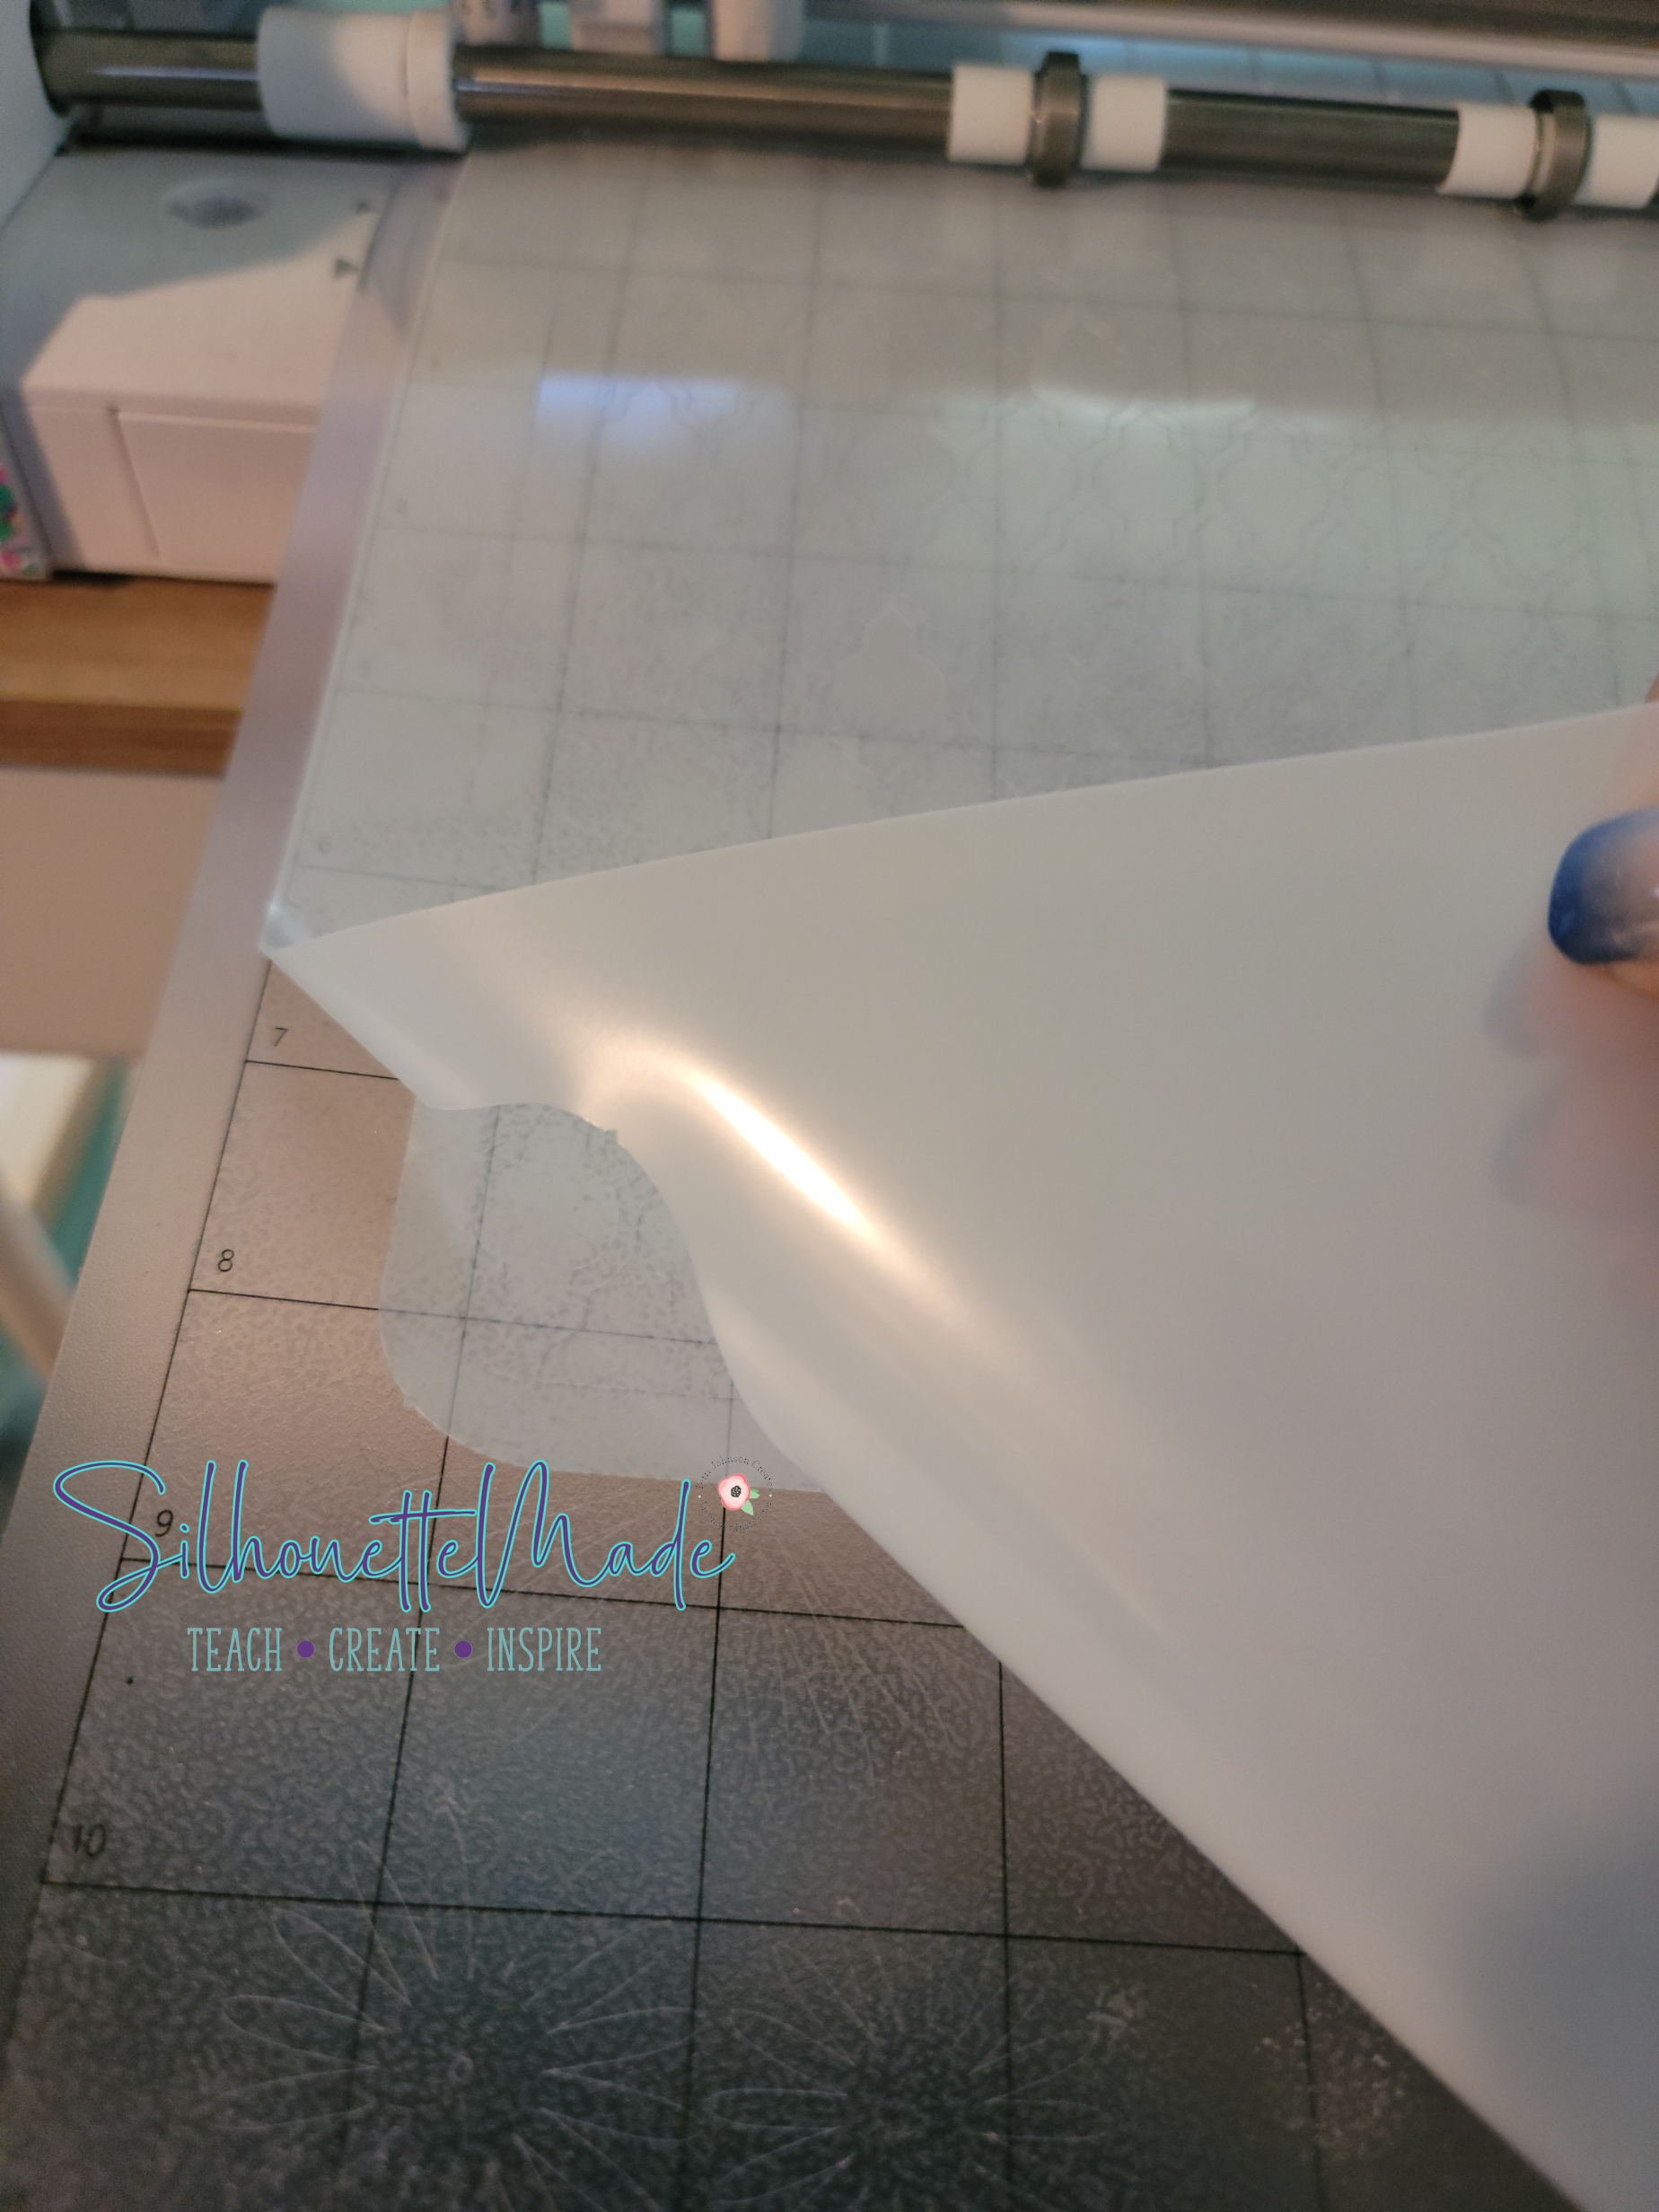
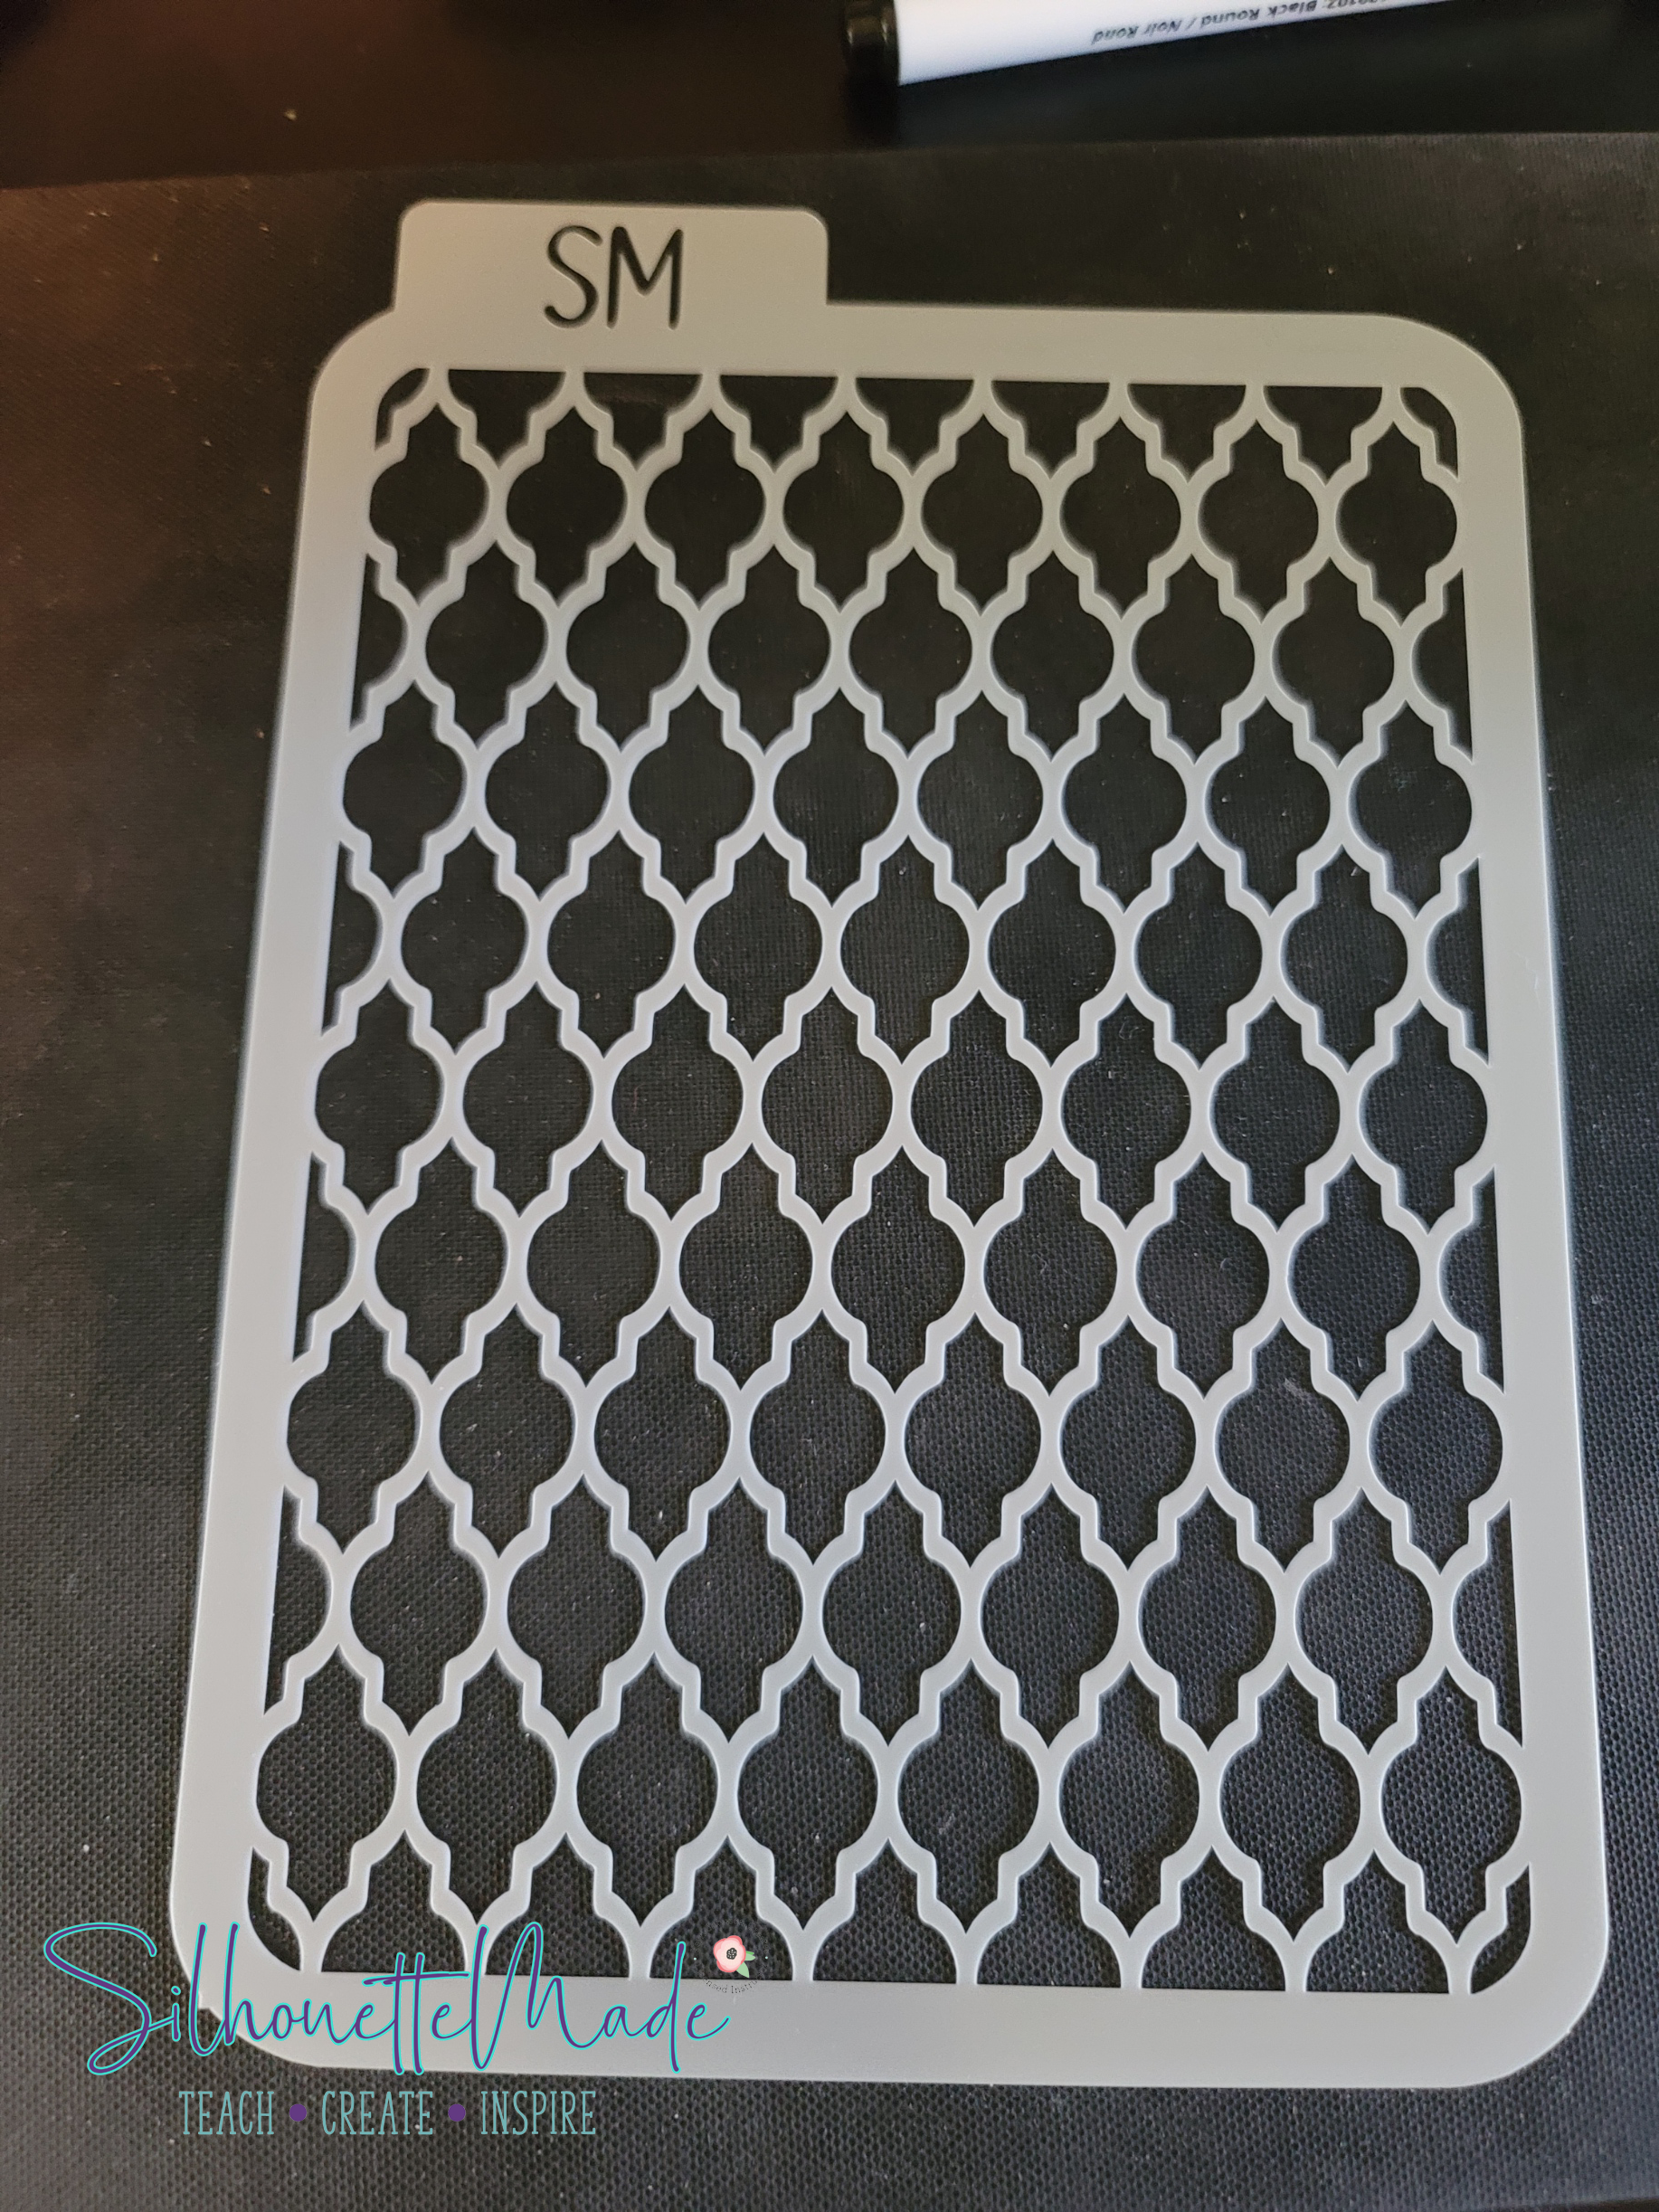
When you are sure it cut, you can unload the mat and remove the stencil. Now you have a reusable stencil that you can use for any number of projects!
I hope you enjoyed learning how to create your own stencil as much as I enjoyed sharing it with you. I love making stencils and have used them for a wide variety of projects.
I would love to see what you create! Feel free to share your projects with me. You can post photos or ask questions on my Facebook page or group:
www.facebook.com/groups/SilhouetteMadewithSarah
www.facebook.com/SilhouetteMade
To share or save this post please pin the image below.
Thank you so much
Thank you Sarah, this is a very clear explanation. Much appreciated.
Thanks for this very clear explanation.